First attempt
To whoever reads this, I've written down a few of my discoveries while working with the Neptunia Re;Birth engine.
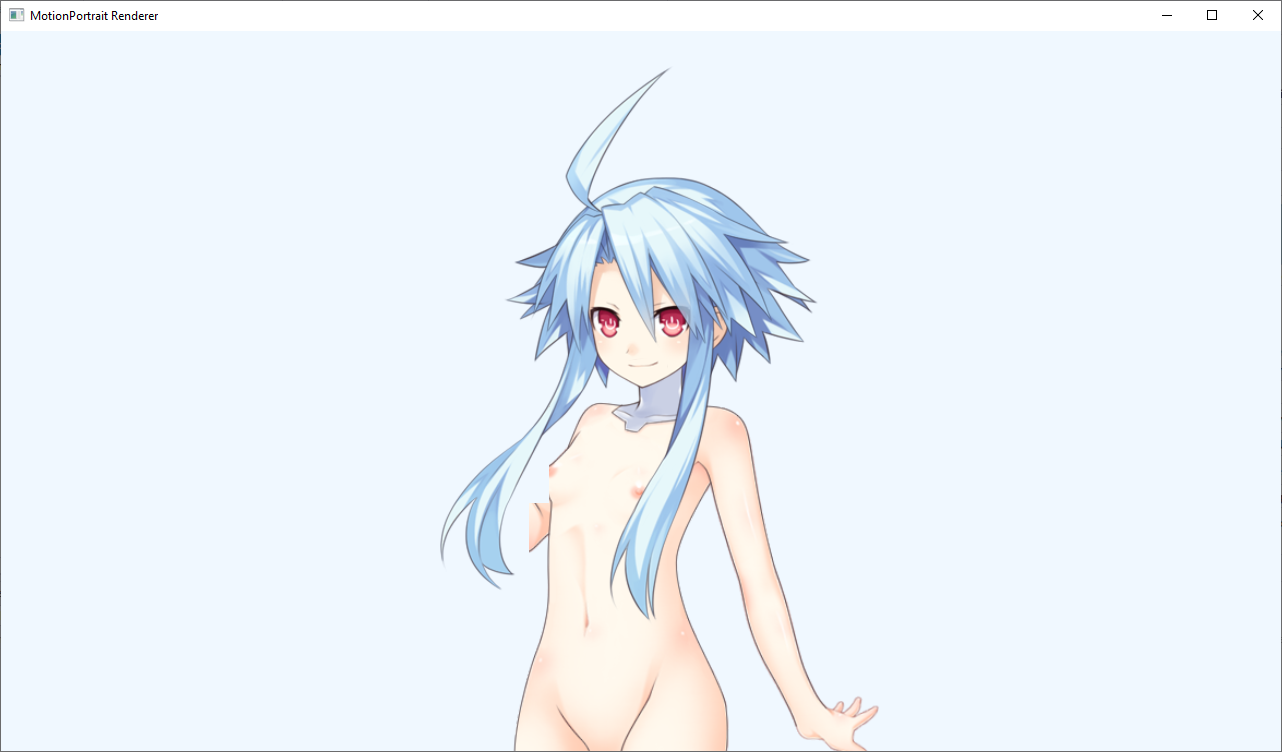
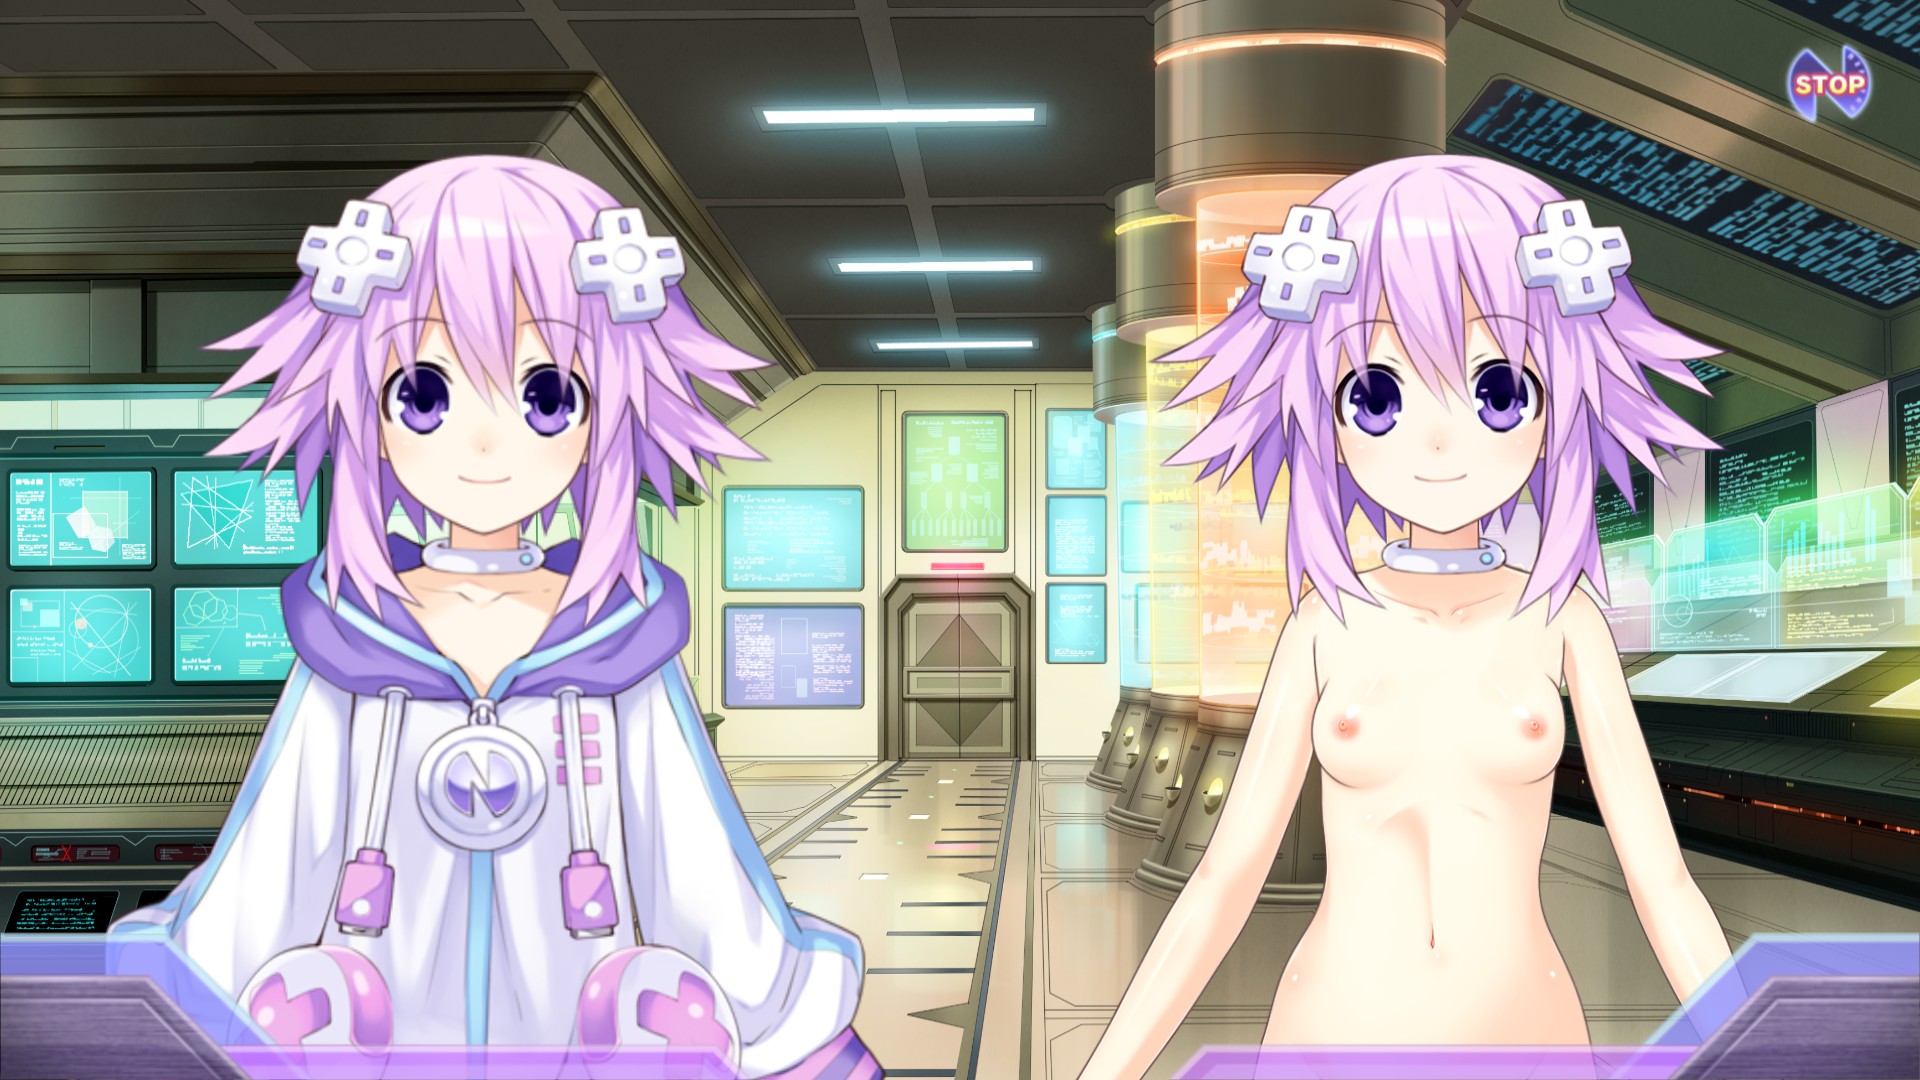
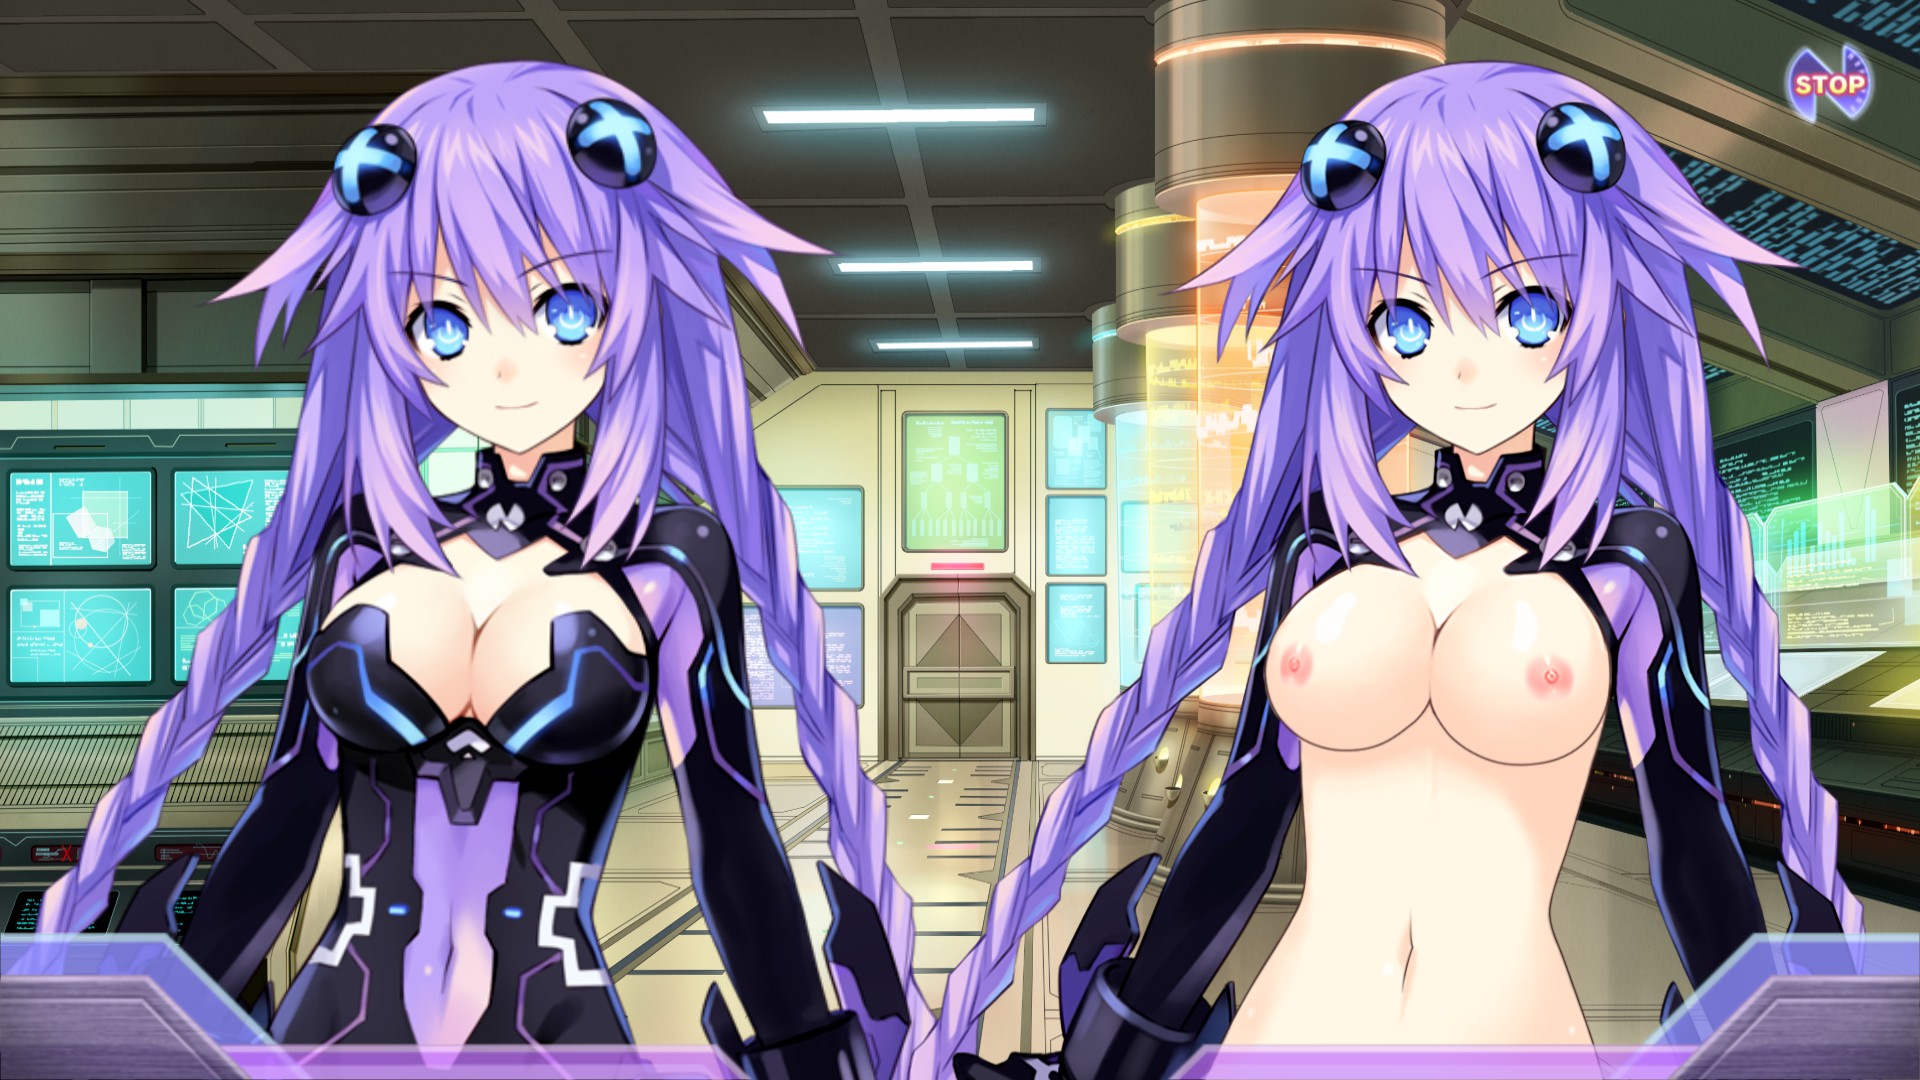
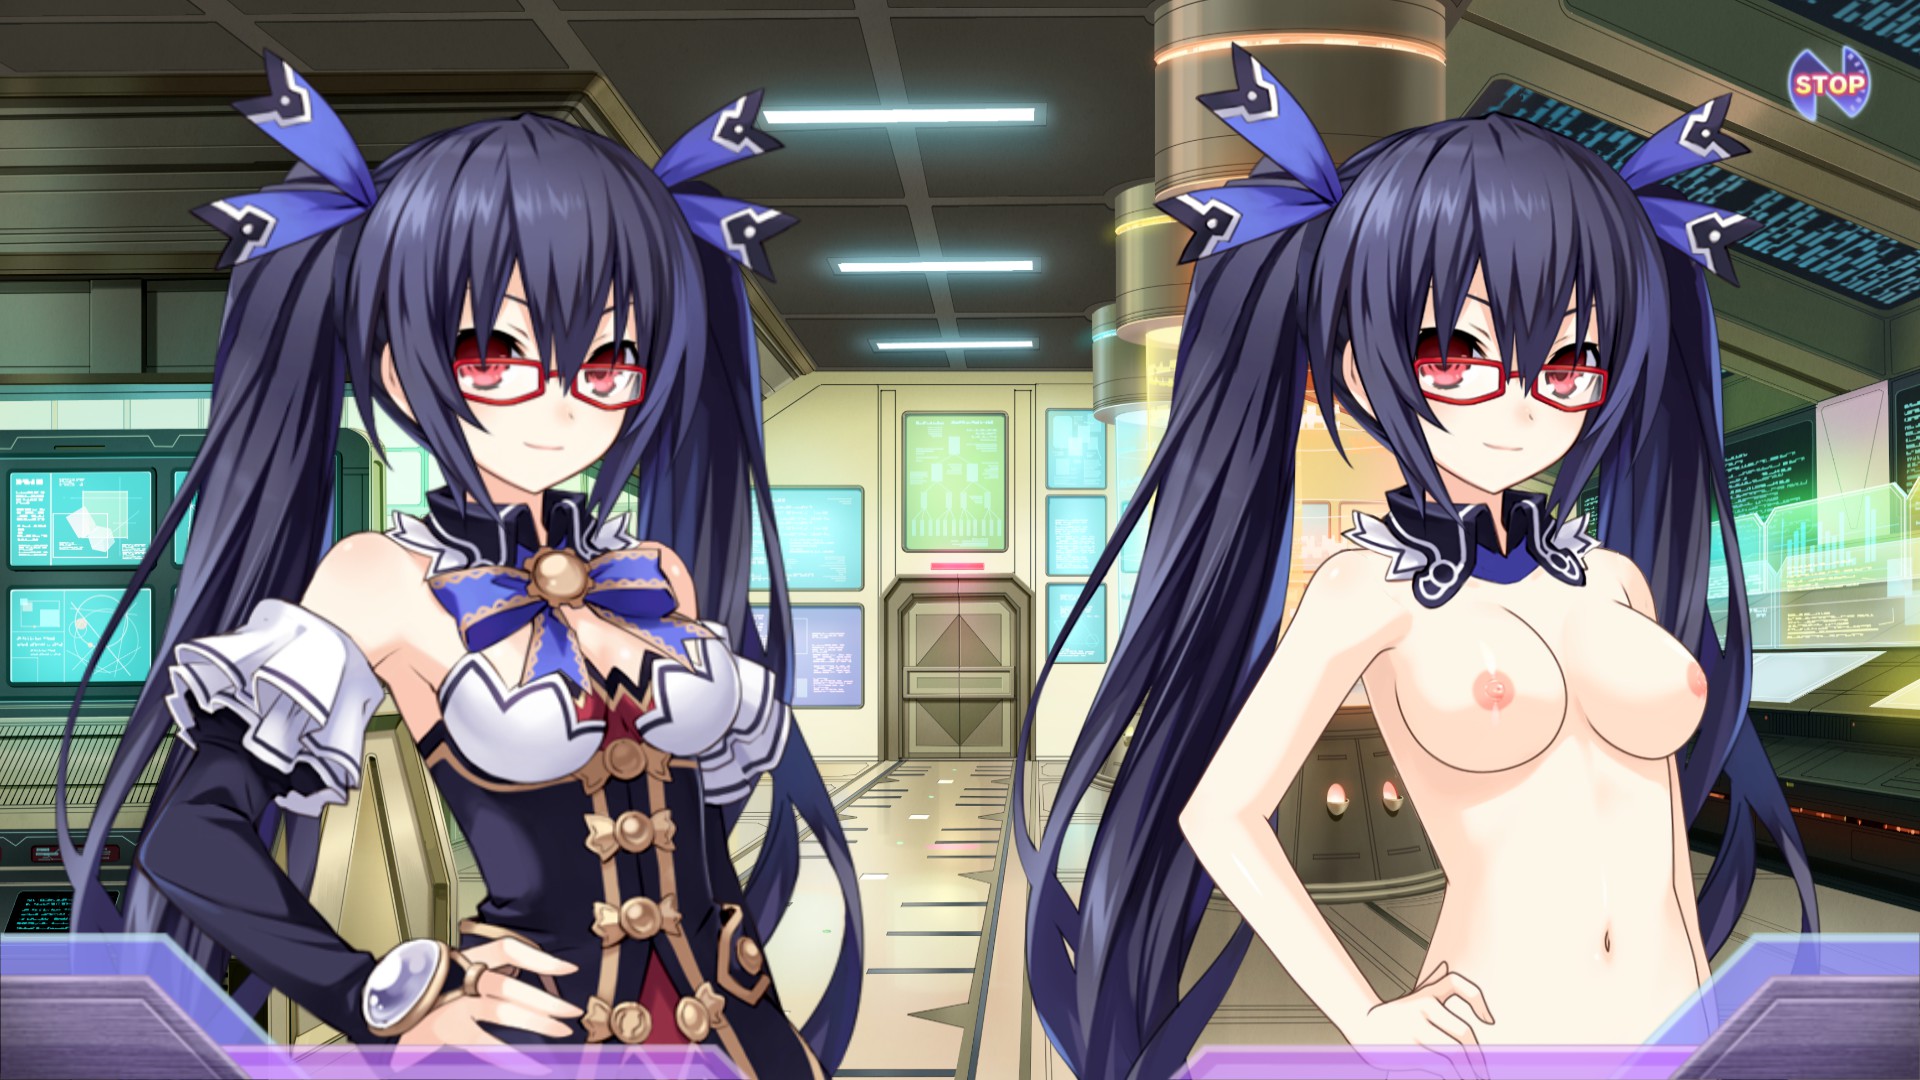
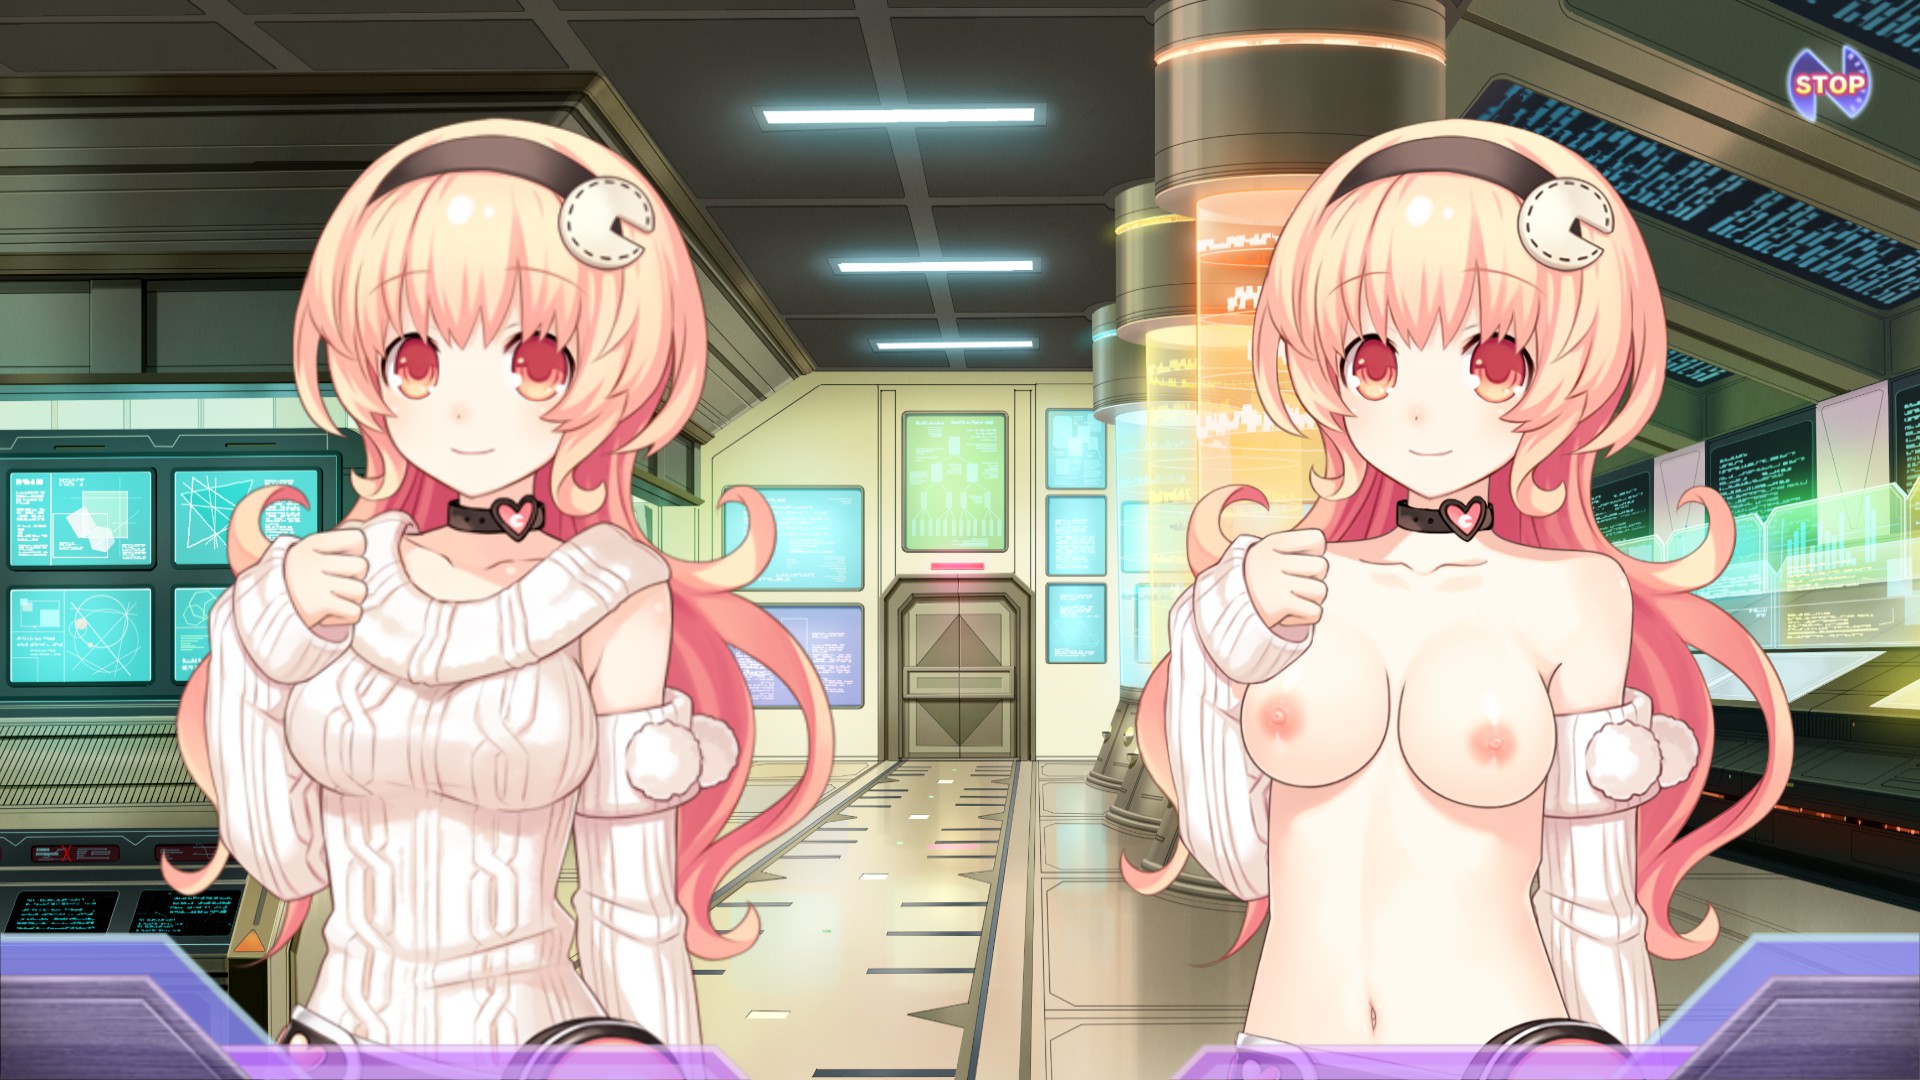
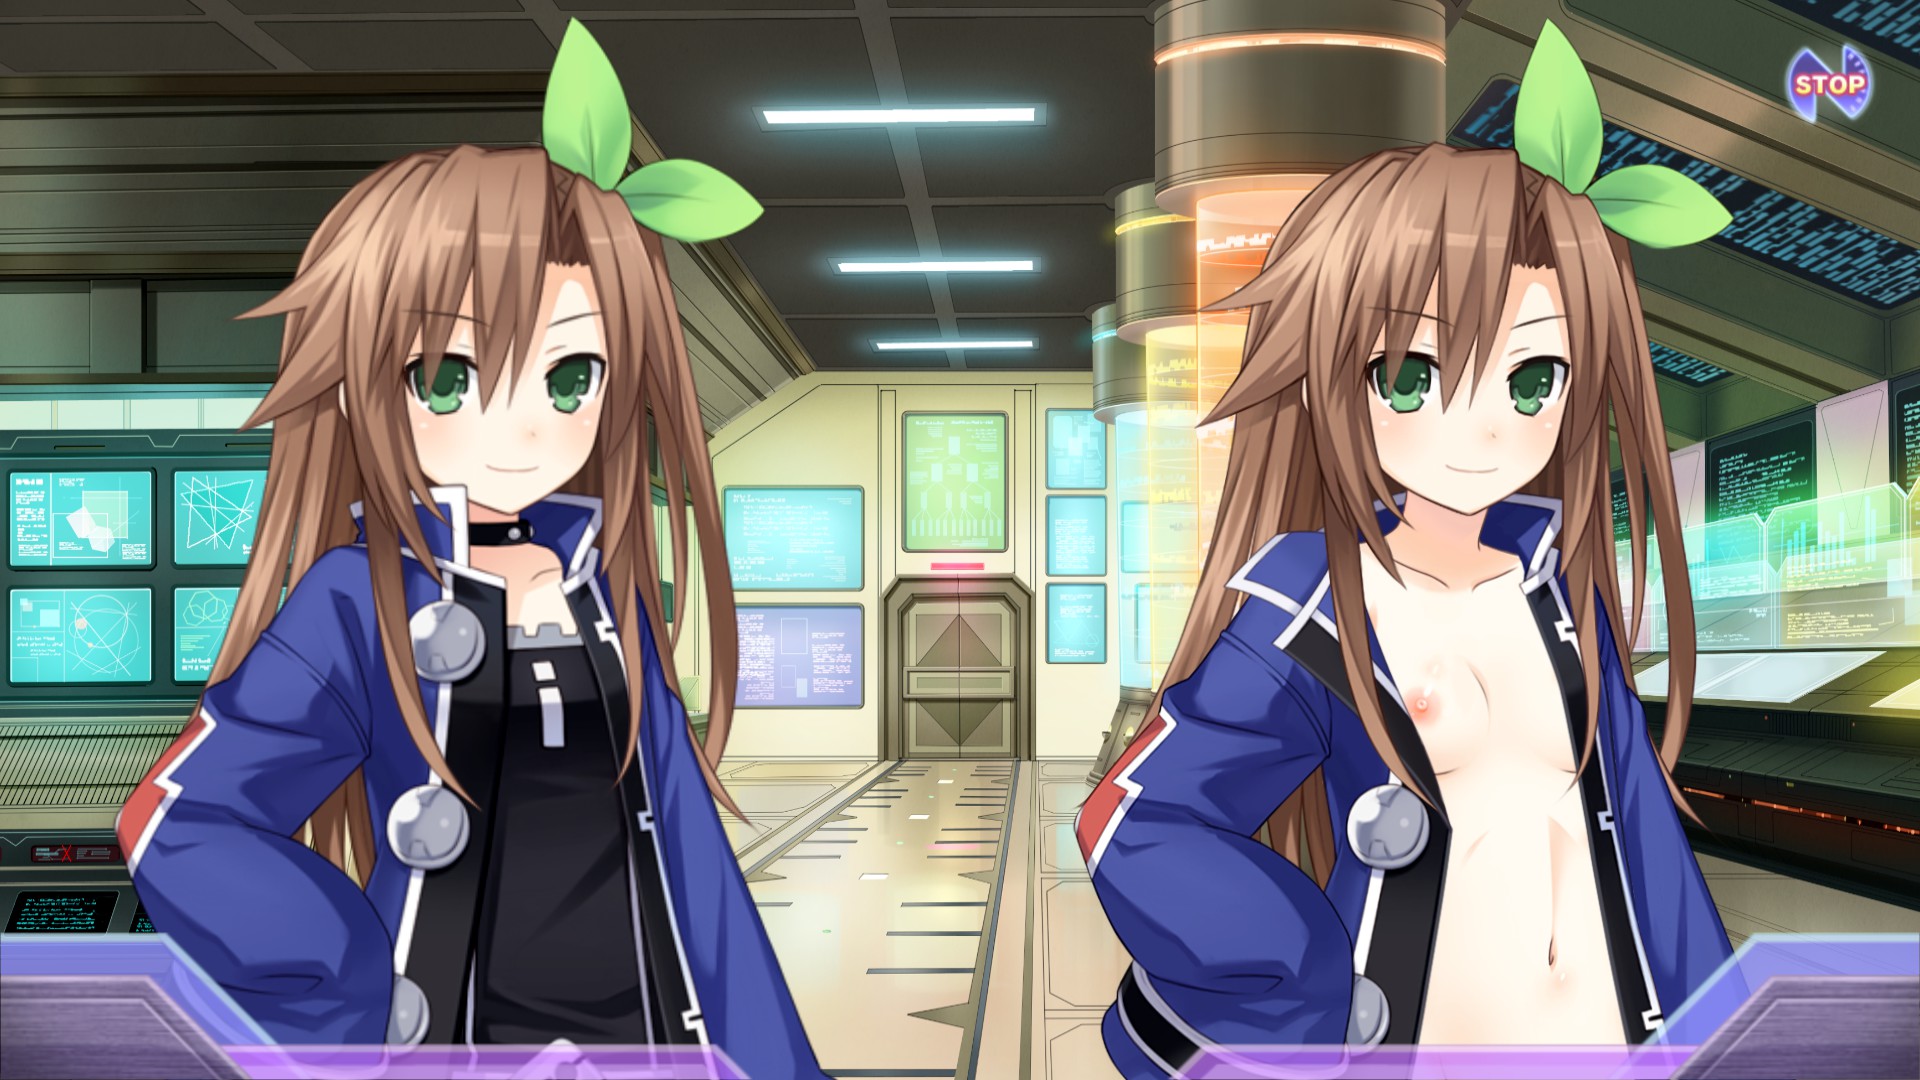
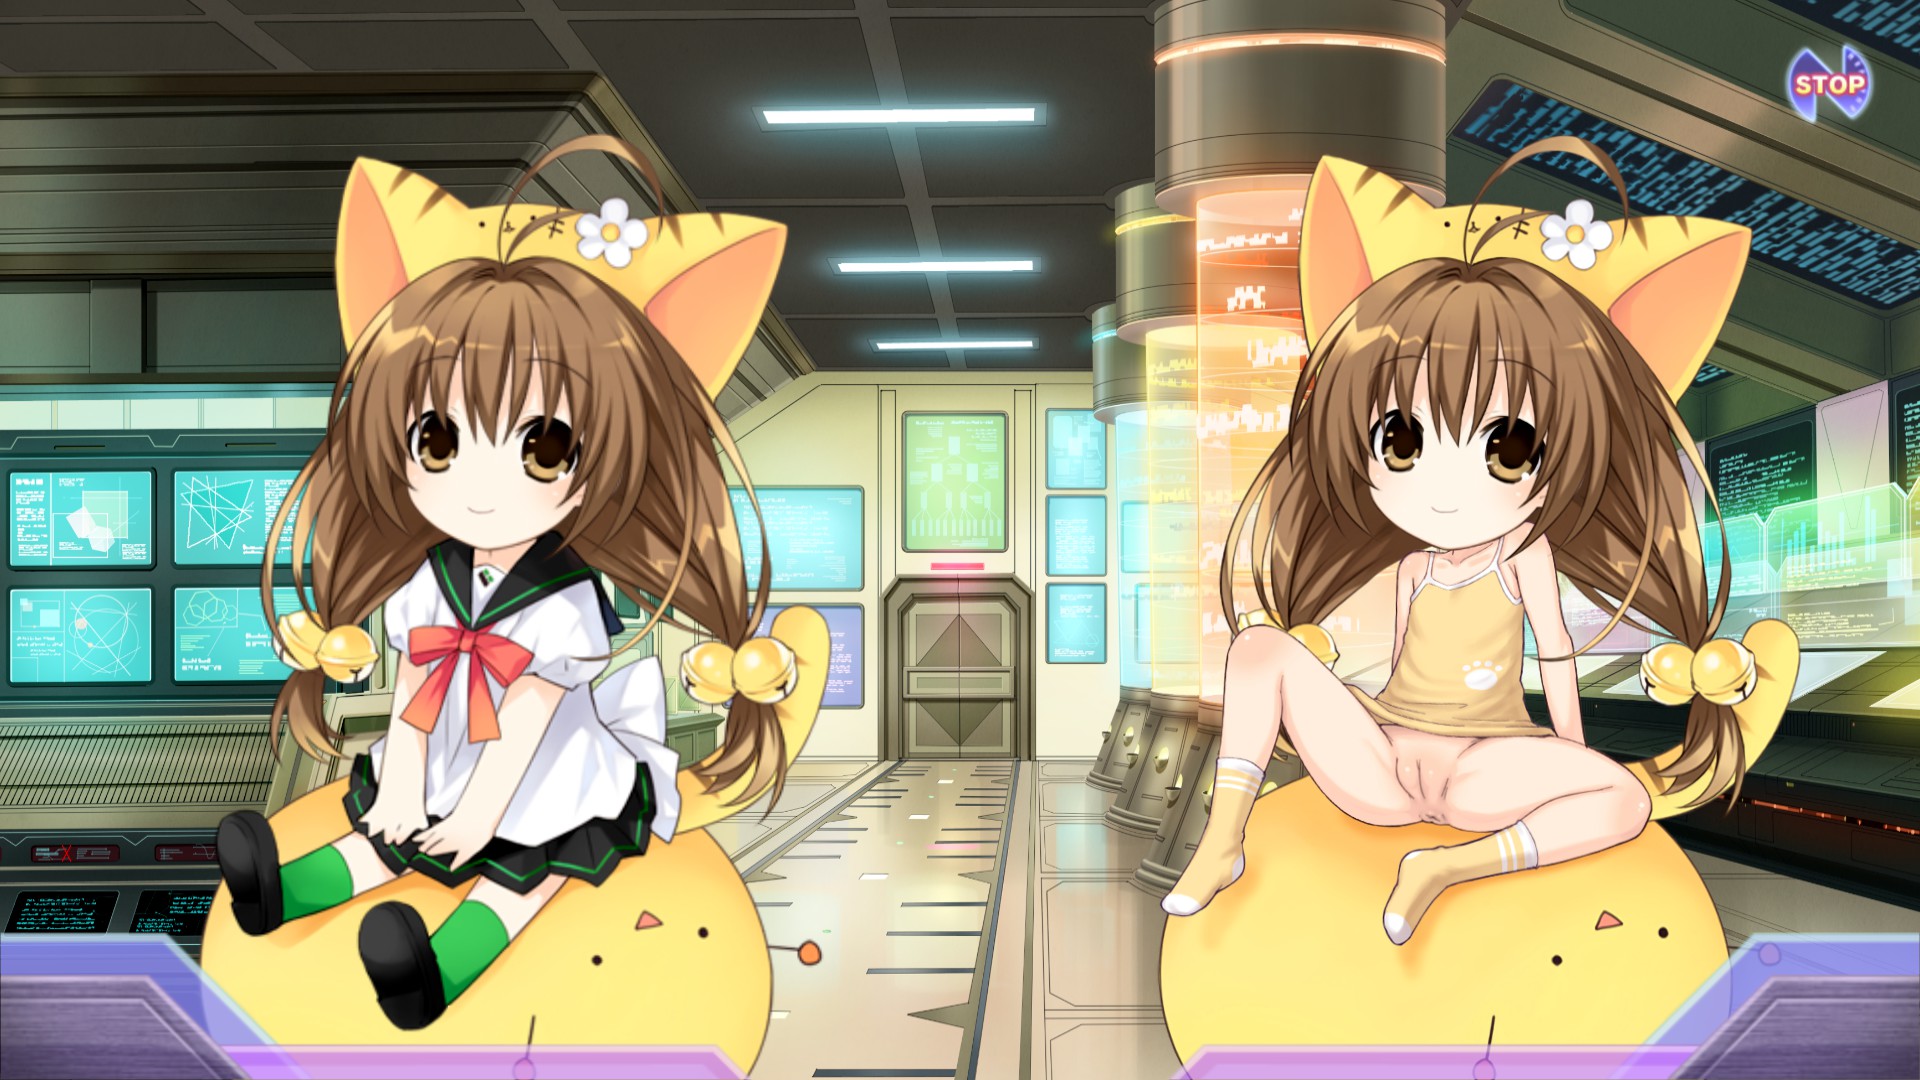
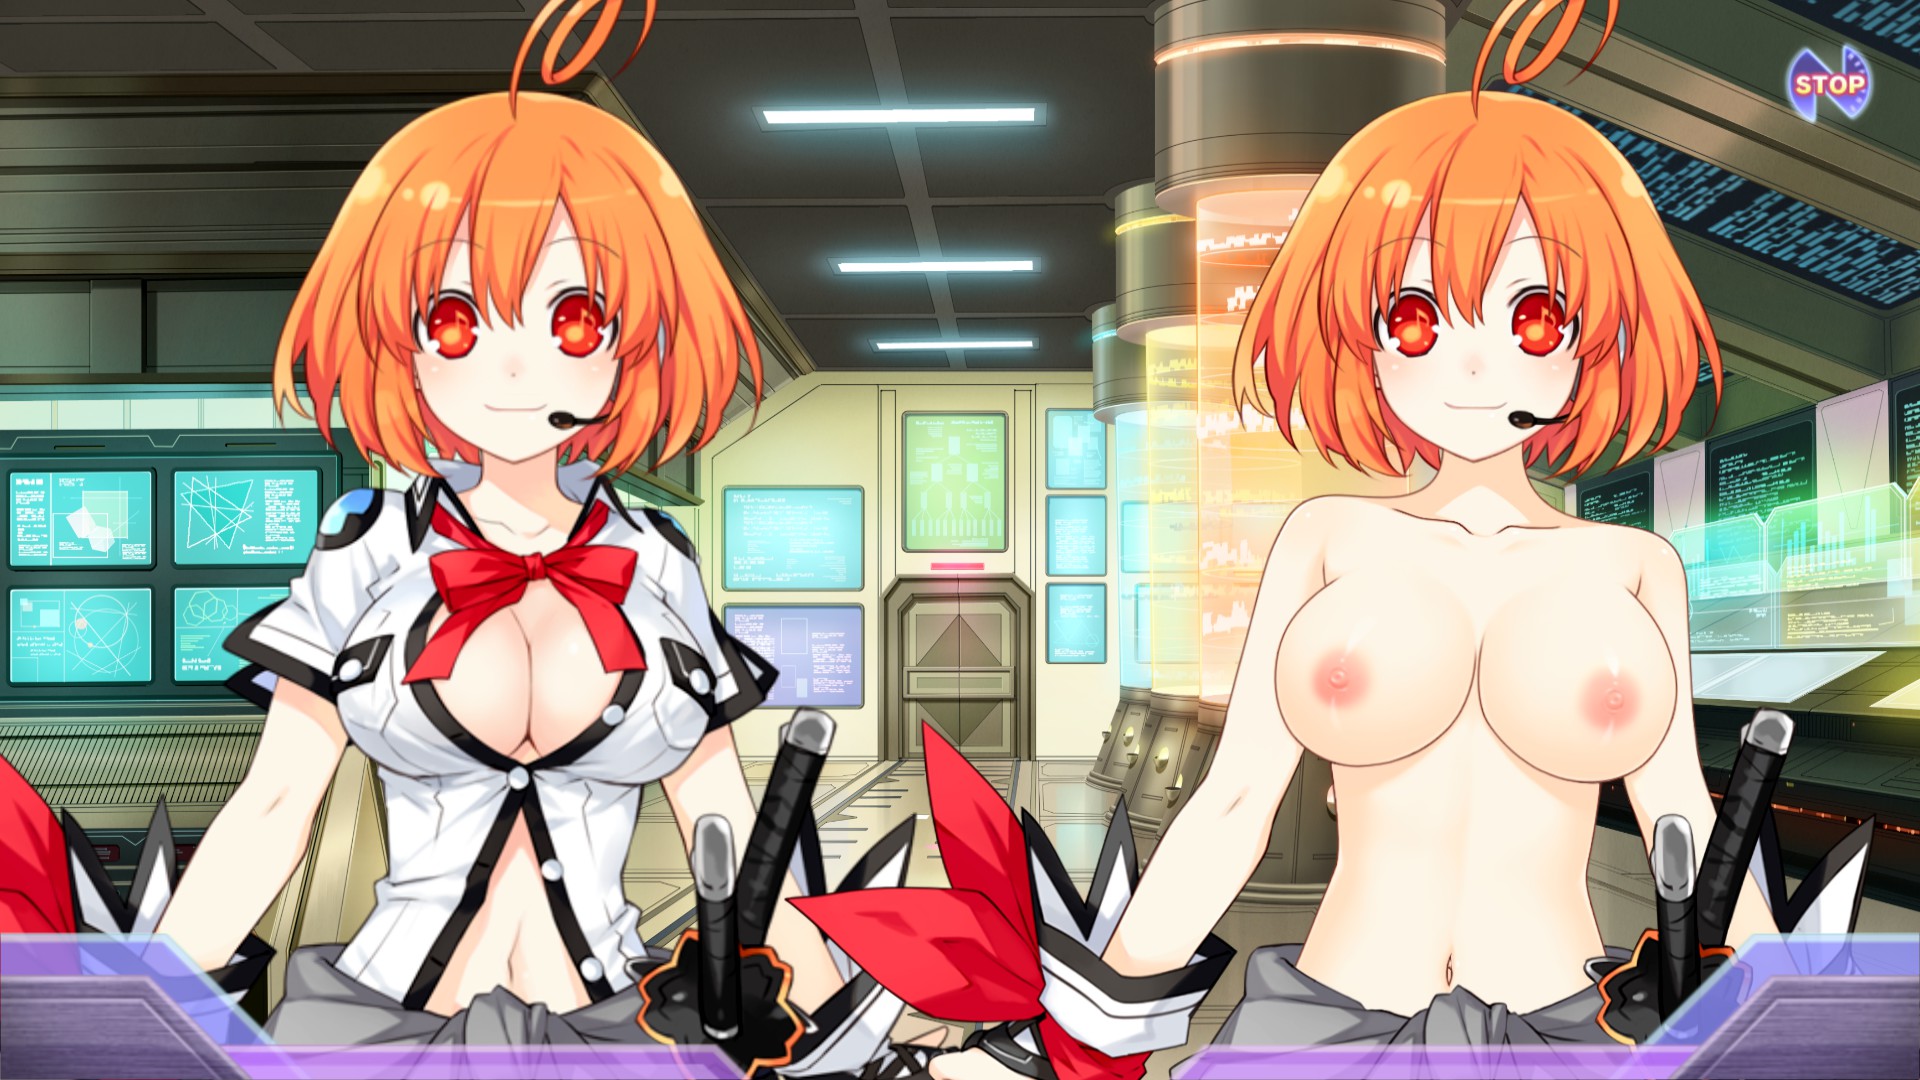
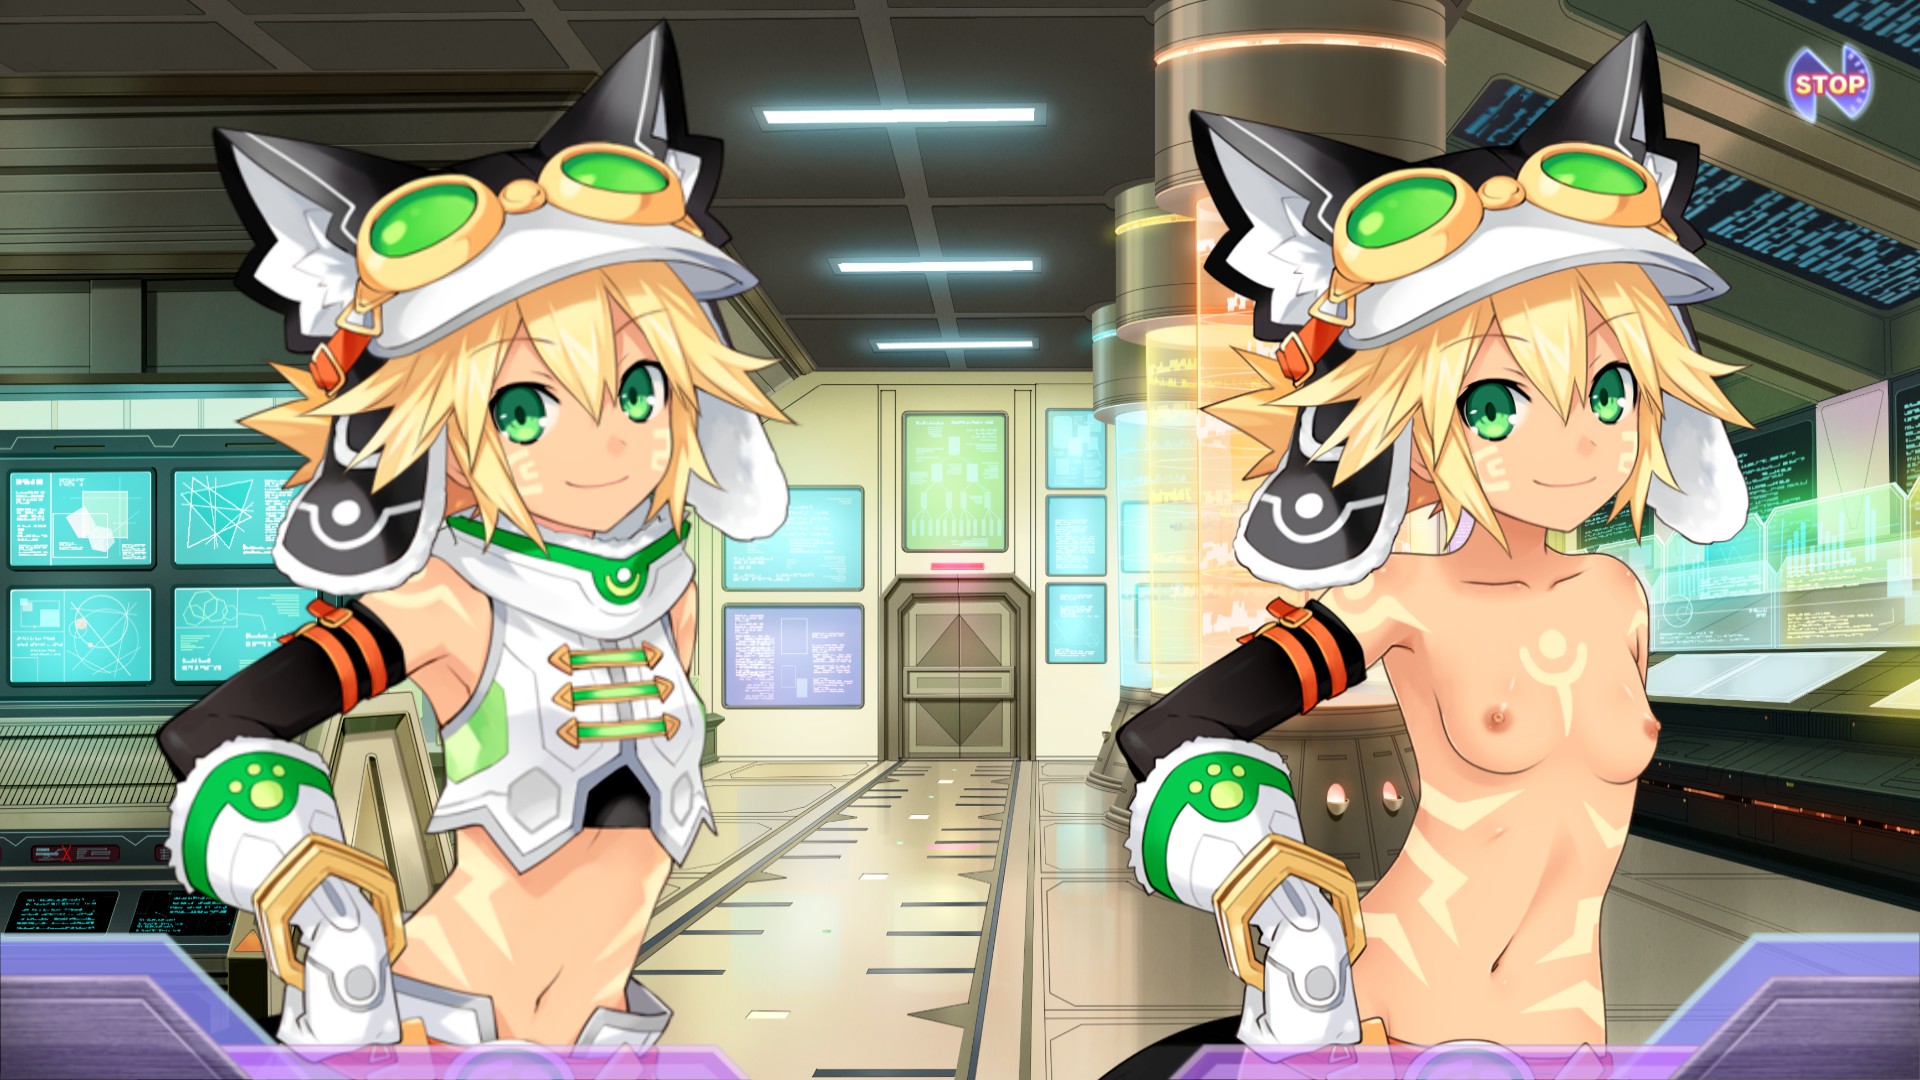
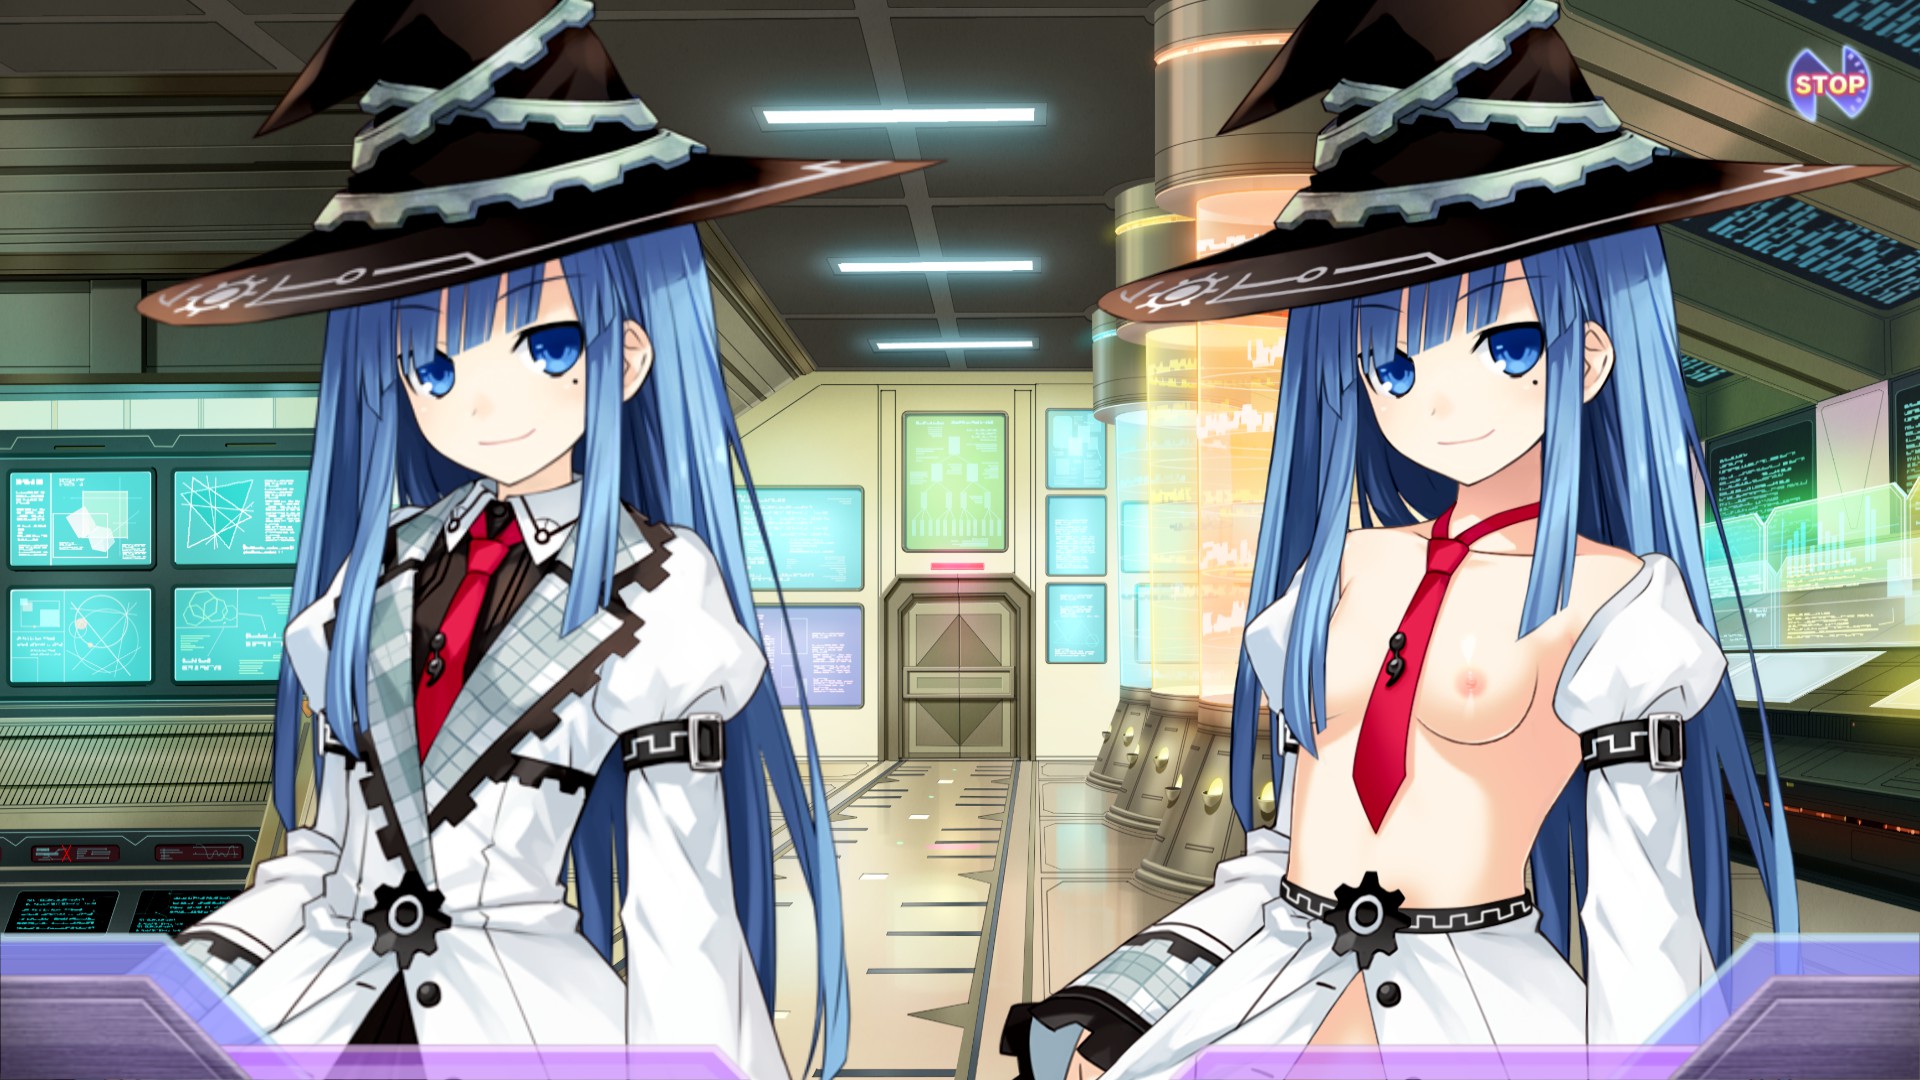
First of all, what am I trying to achieve? Simply put, I'm working on a nude patch for the game. There is an existing patch, but I'm personally not a big fan of the edited sprites, so I decided to give it a shot myself.
I hope this article will give some insights into my approaches to tackling common issues when working with an unknown engine.
First point of order was extracting the files that would need to be edited.
The engine uses several different formats for its archives, but the files I'm interested in are all located within .pac archives.
Luckily, QuickBMS, the amazing file extractor by Luigi Auriemma, supports the proprietary compression algorithm and provides a script for extracting files from the .pac archives.
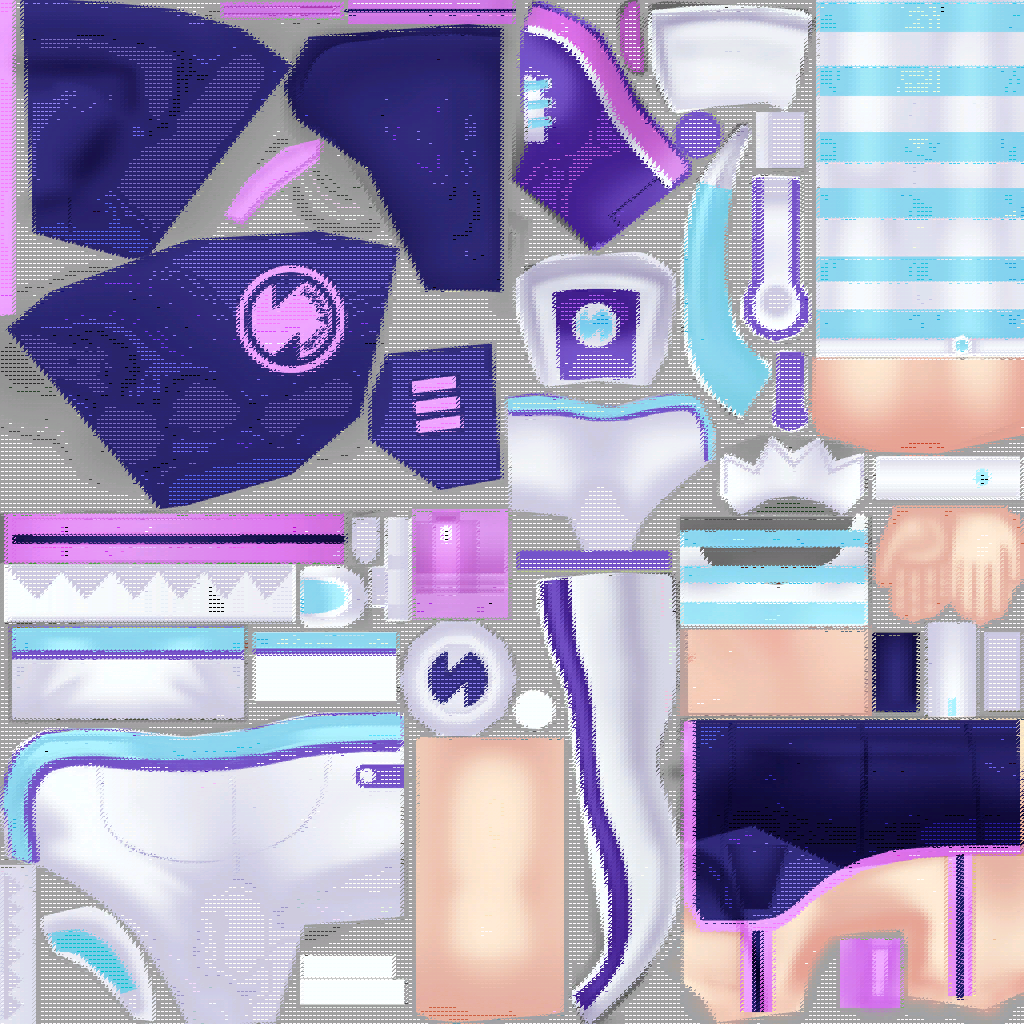
The 2D character sprites used during the visual novel sections of the game are located under /event/mp/ within the GAME00000.pac archive. There is a subfolder for every character, named according to their character ID, which contains two files: face.mpb and tex_all.tid. We'll ignore the first one for now and focus on the .tid file, as it contains the texture with all the character's animated parts.
This post by TheUkrainianBard on the zenhax forums was a great starting point to deciphering the TID file format, as it explained the most relevant header fields. It also linked to a TID~DDS converter, but I figured PNG~DDS~TID~PAC was a pretty unwieldy workflow every time I would want to check a texture edit in game, so I decided to implement a tool to directly insert a PNG image into the archive.
The TID format has two non-trivial features, one being support for S3 texture compression, the other being Z-order swizzling, also known as Morton swizzling. The character textures actually don't use either or these, but simply store the uncompressed bitmap. Because of this, inserting them into the game was as simple as decoding the png and copying the bitmap straight into the archive at the correct offset. The only issue was that the game uses a channel byte order that is not supported by GDI+, so I had to do some manual channel reordering first. Locking the bits in little-endian ARGB format (byte order: blue, green, red, alpha) and swapping the blue and red channels converts it to big-endian RGBA (byte order: red, green, blue, alpha), which seems to be what the TID format uses.
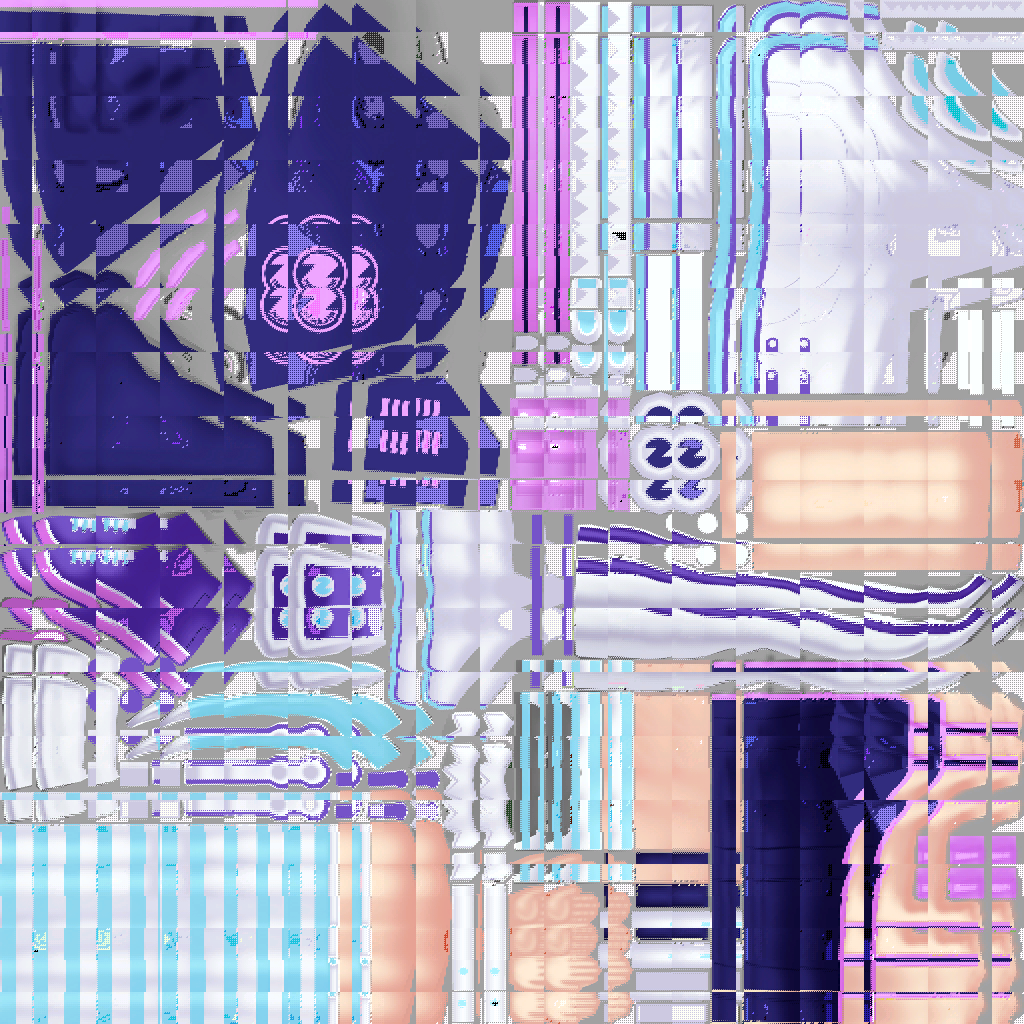
Now, being who I am, I wasn't content with that and implemented the texture decompression and un-swizzling anyway, just to be able to view the other textures as well.
First attempt
Colors!
Fixed the four colums
Correct channel order
Un-swizzling pixels after DXT decode
Un-swizzling DXT blocks before DXT decode
Fixed a copy paste error that caused every 4th pixel to be skipped
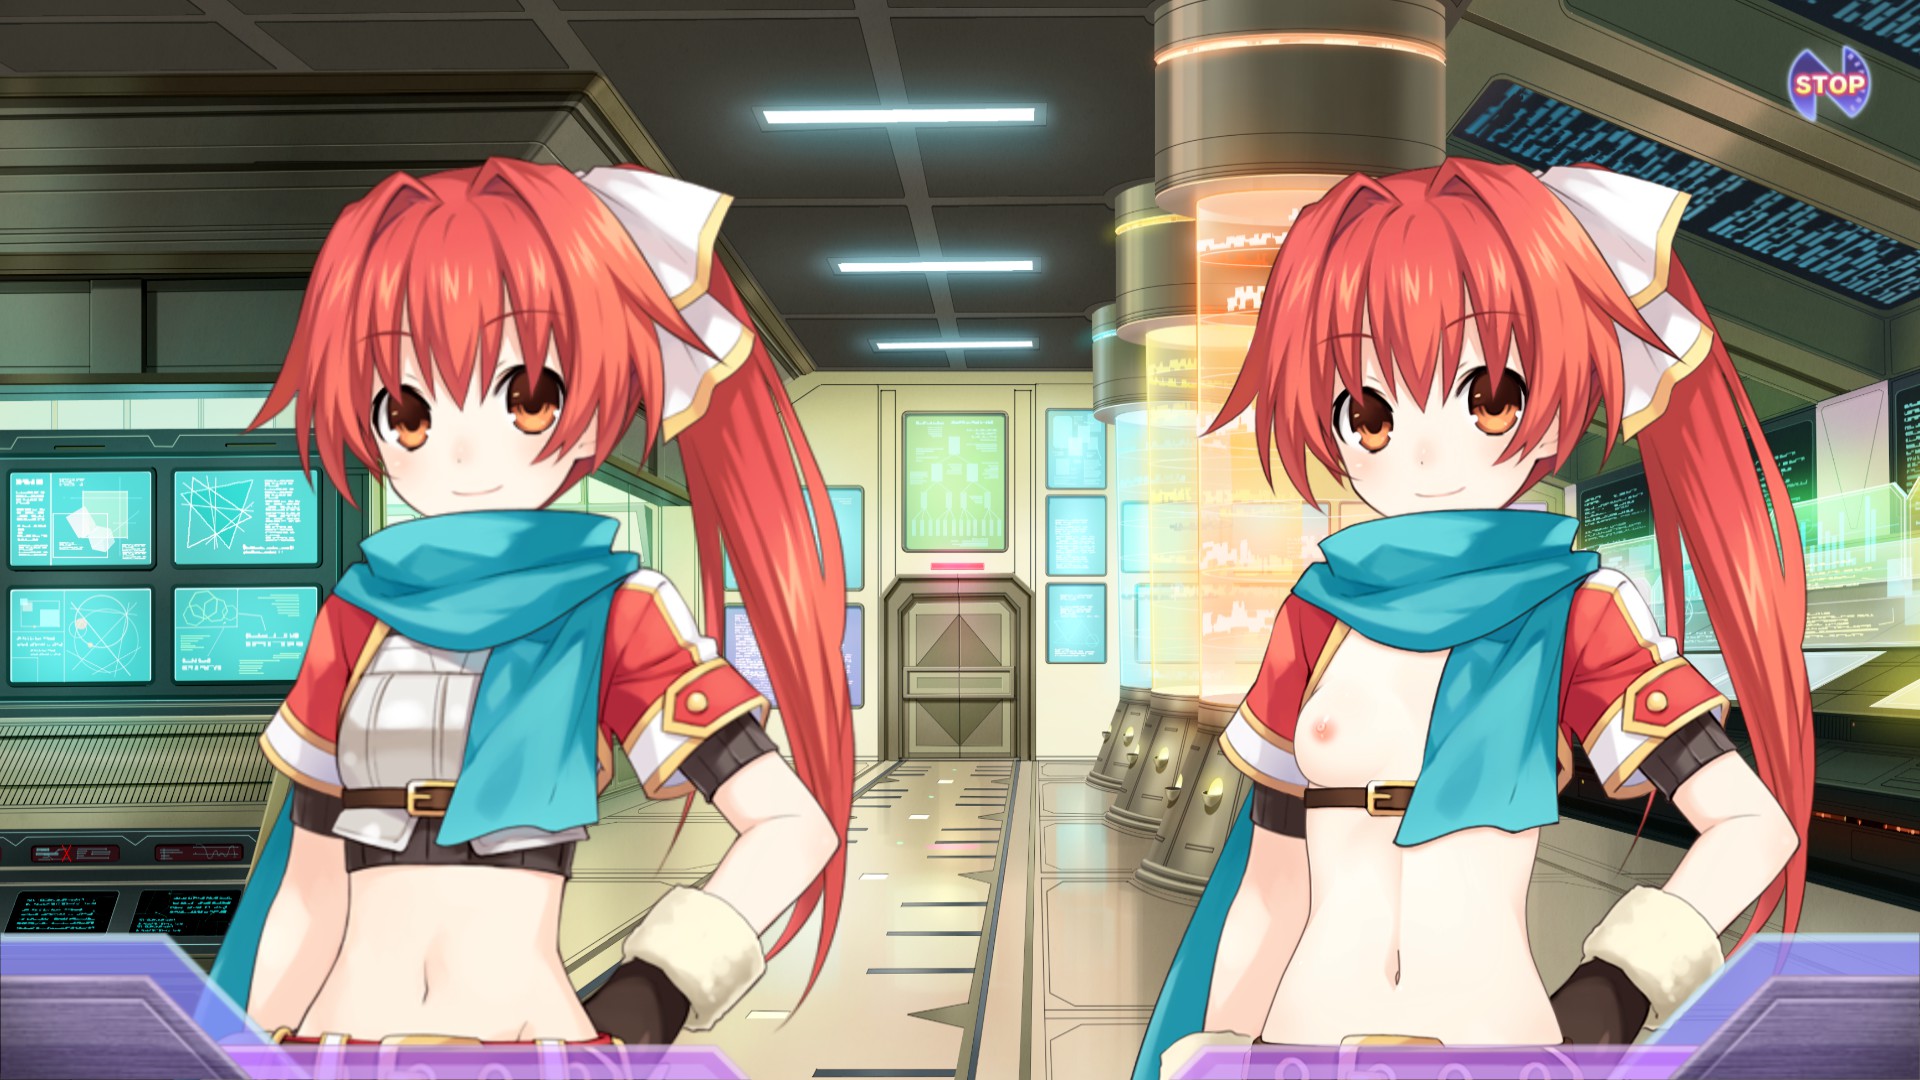
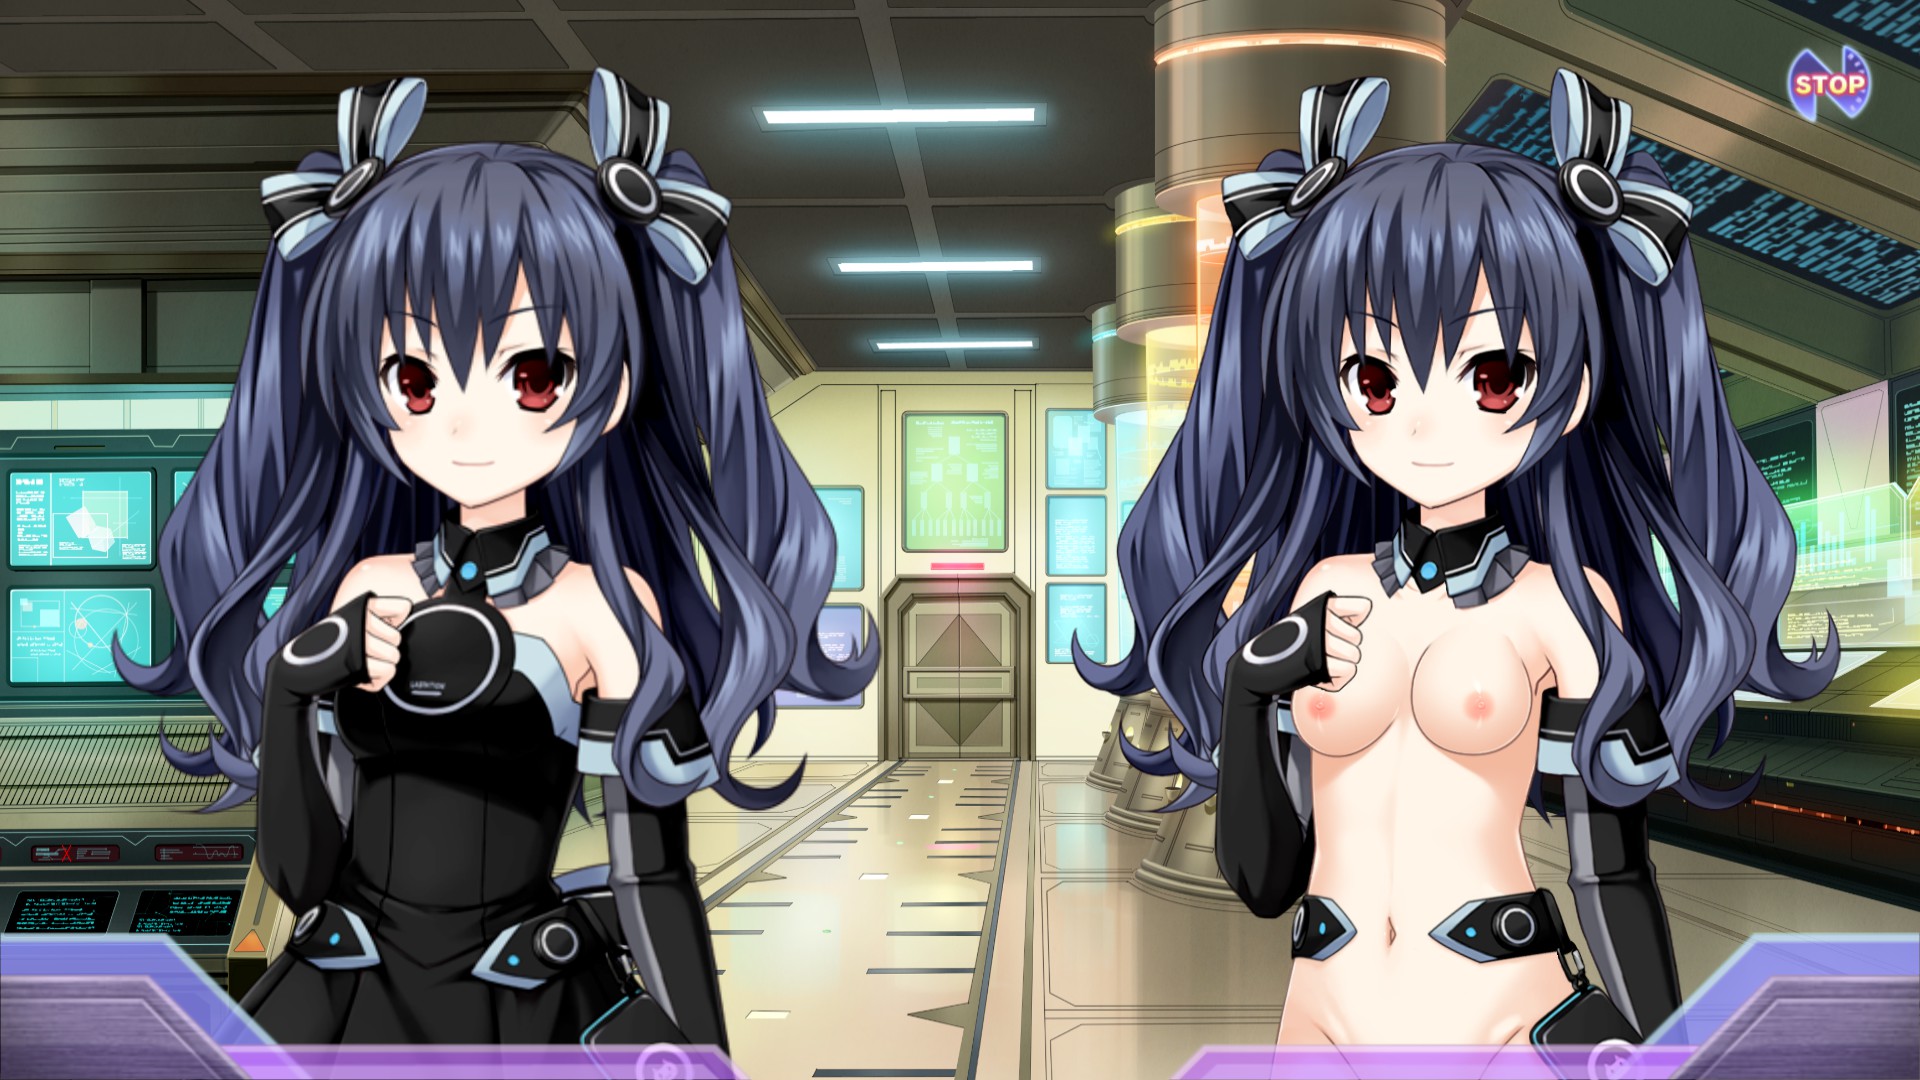
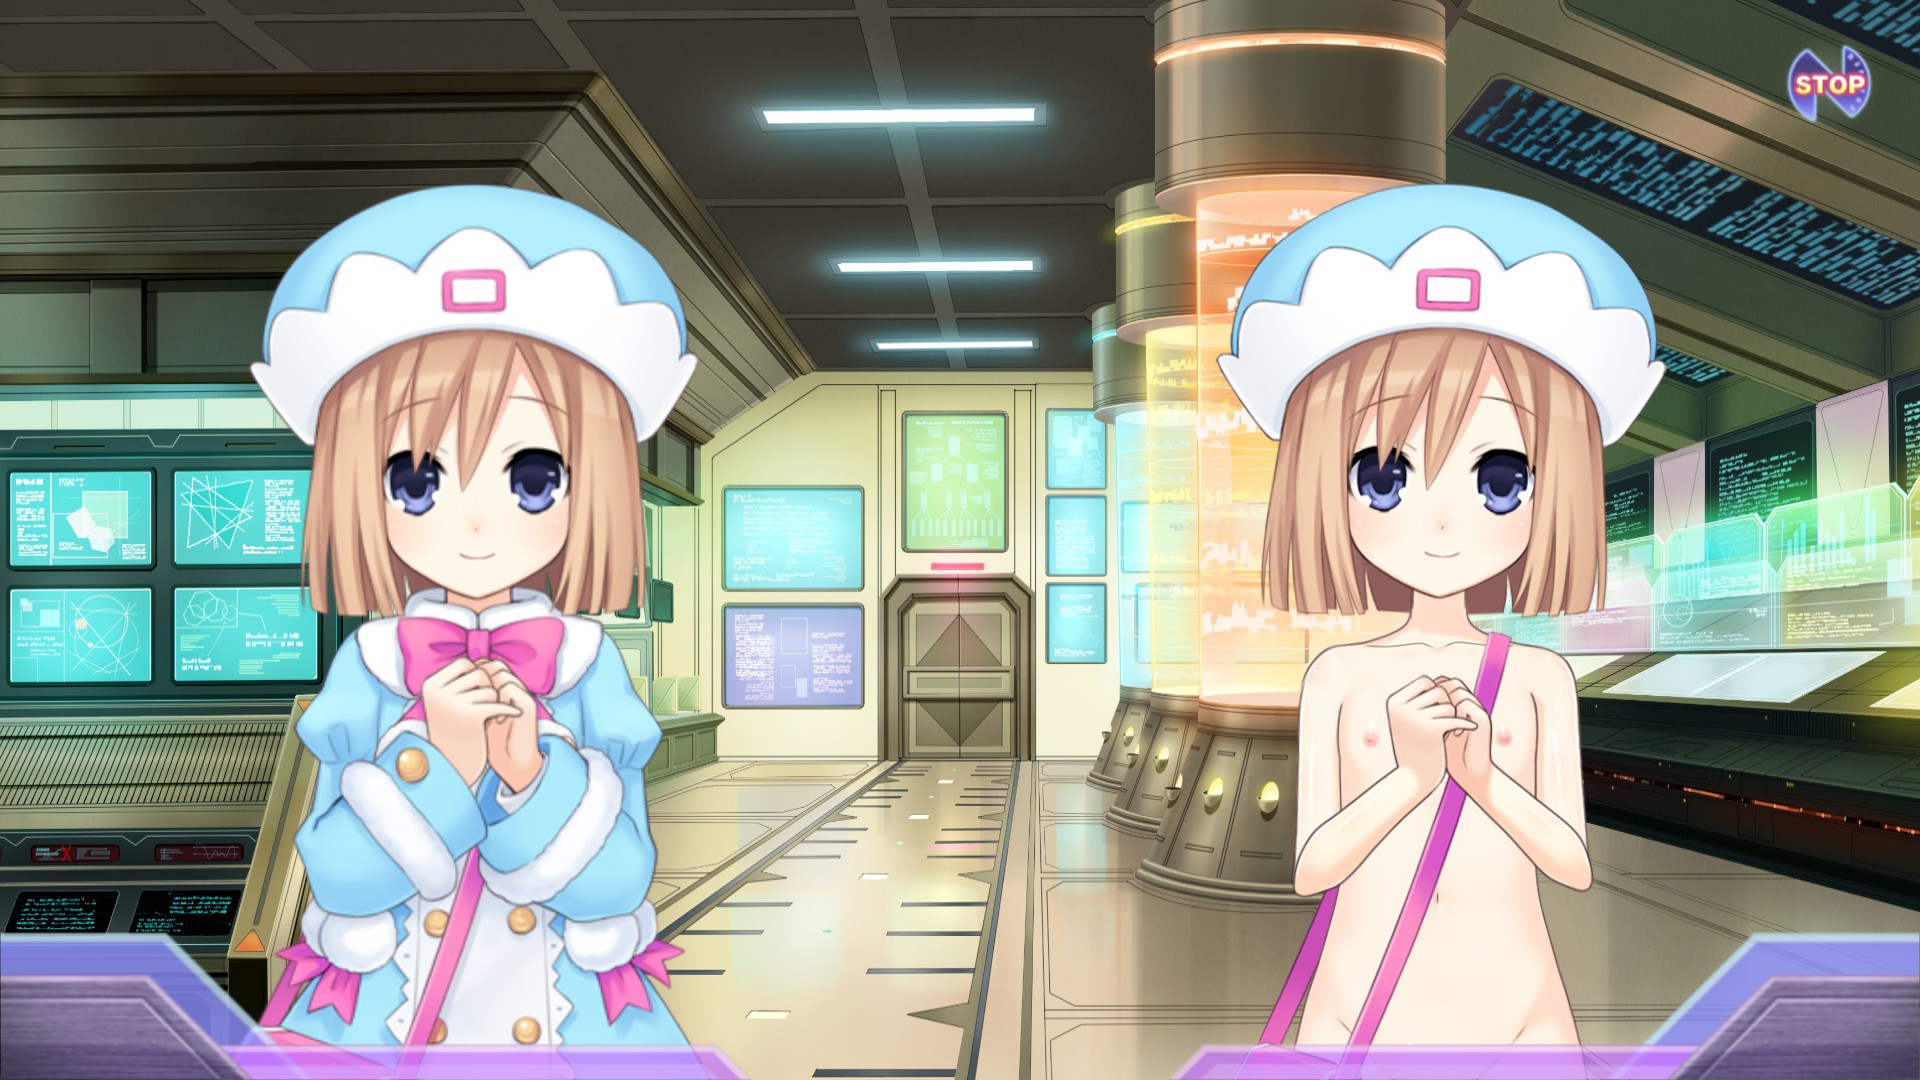
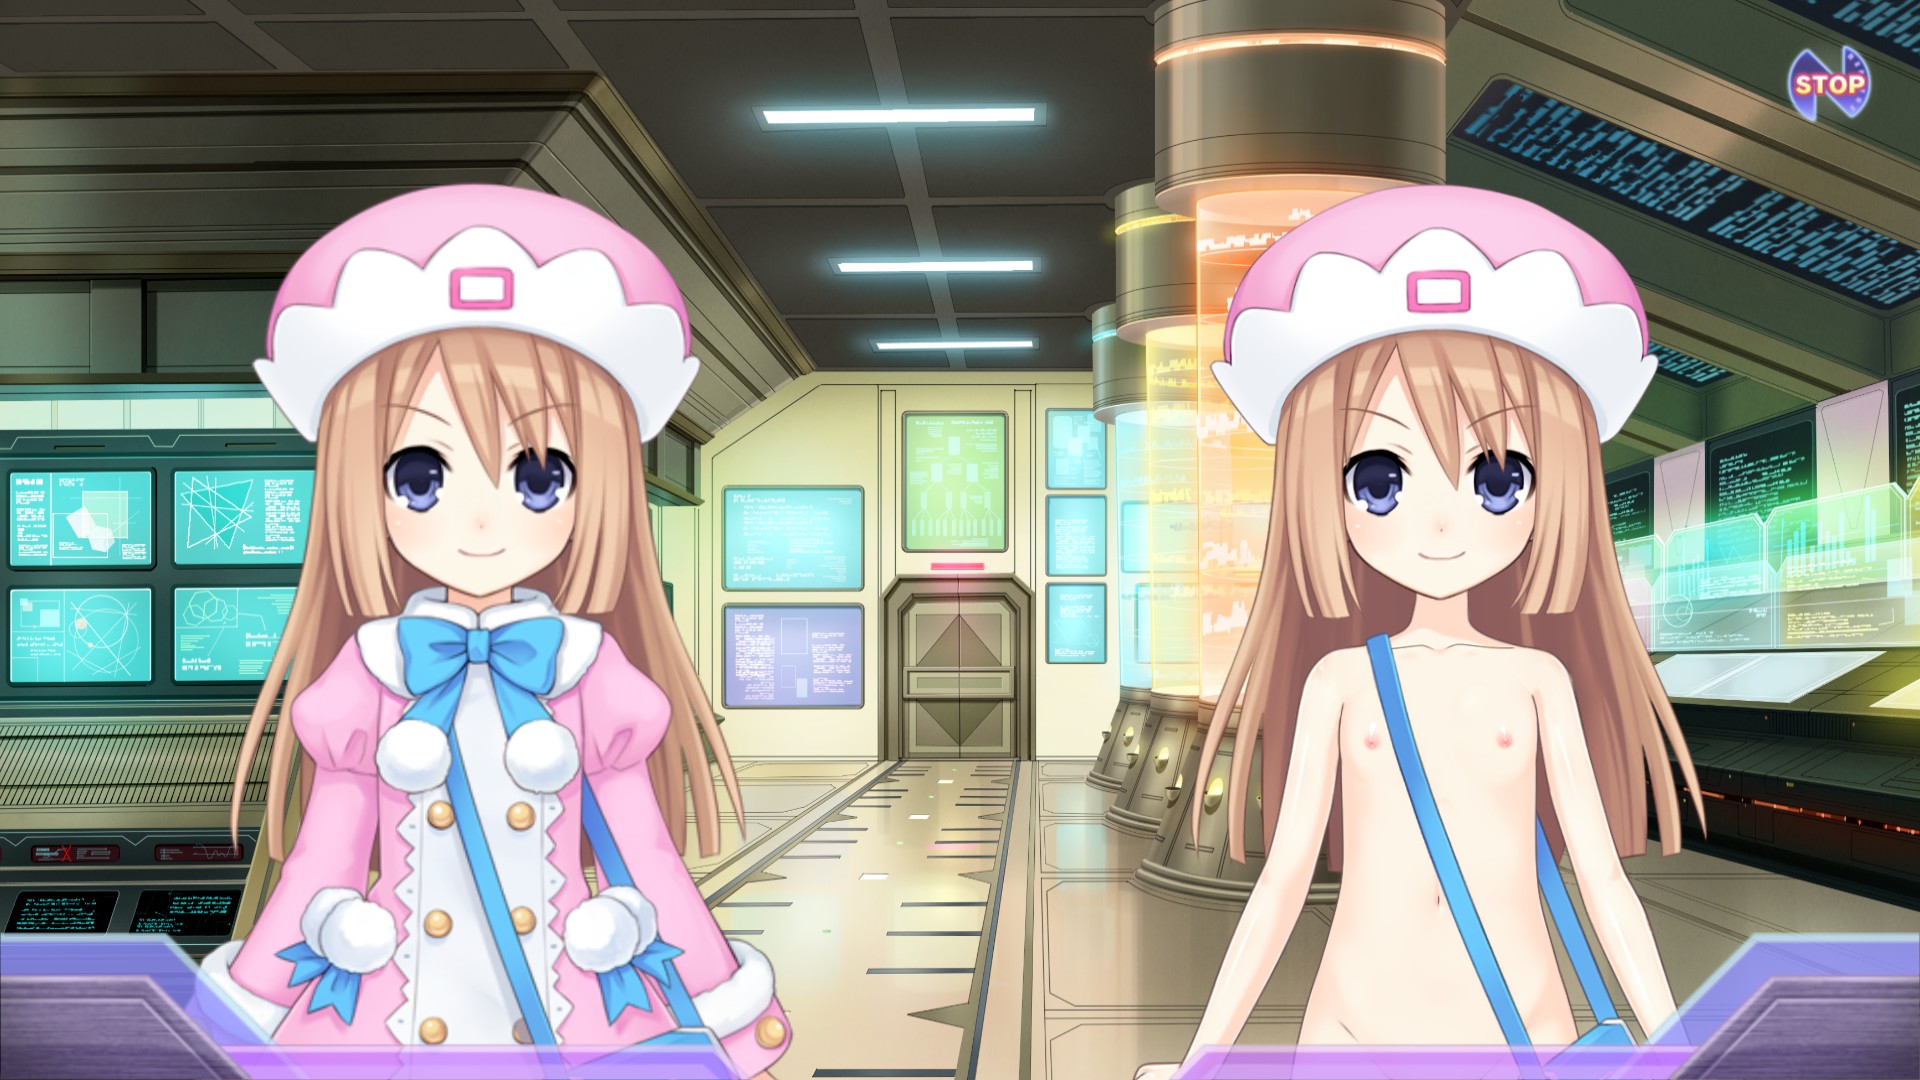
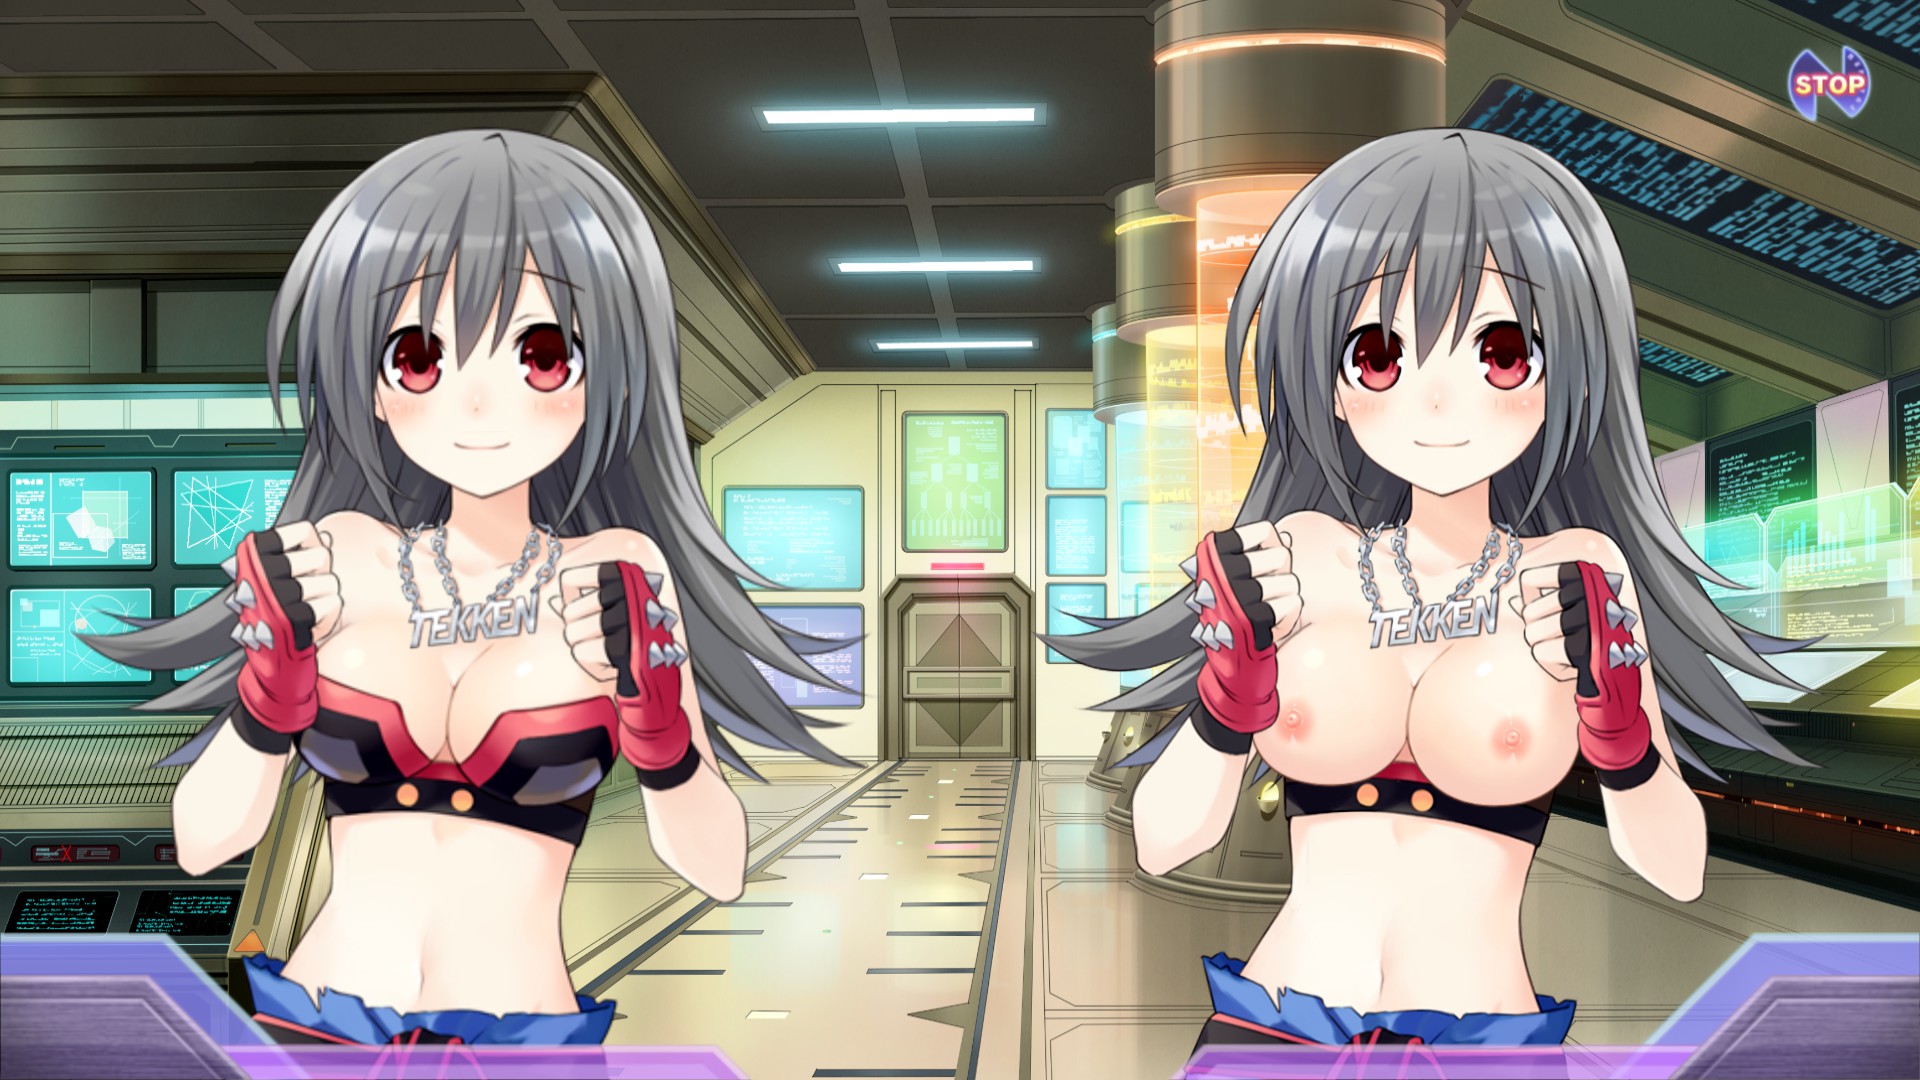
Now it was time to actually start editing the textures. I'm fairly proficient in Photoshop, but I'm not exactly great at drawing. So for this step I spent a lot of time finding nude sprites of characters with similar proportions. For anyone attempting something similar: Filtering by the tags nude, standing and transparent_background on your image board of choice seems to yield the best results, as lots of TA sprites match those criteria.
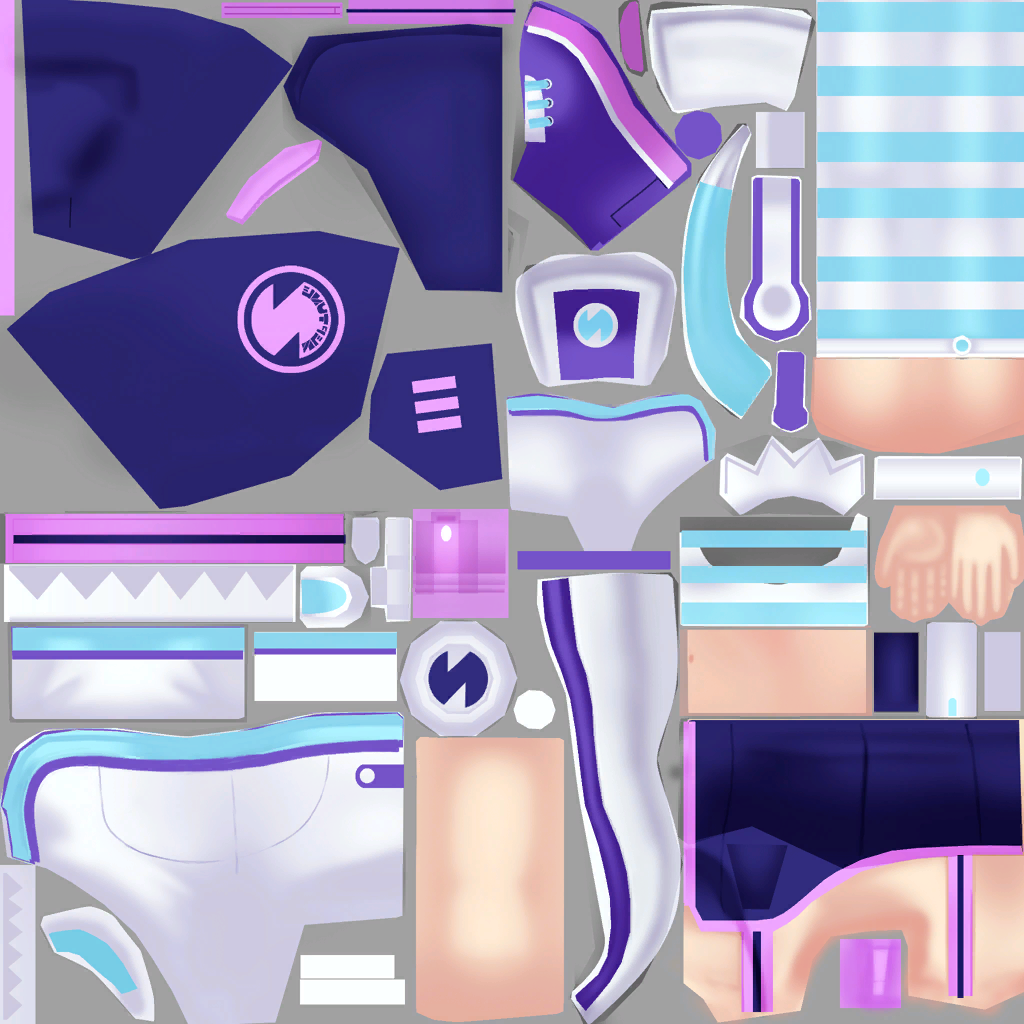
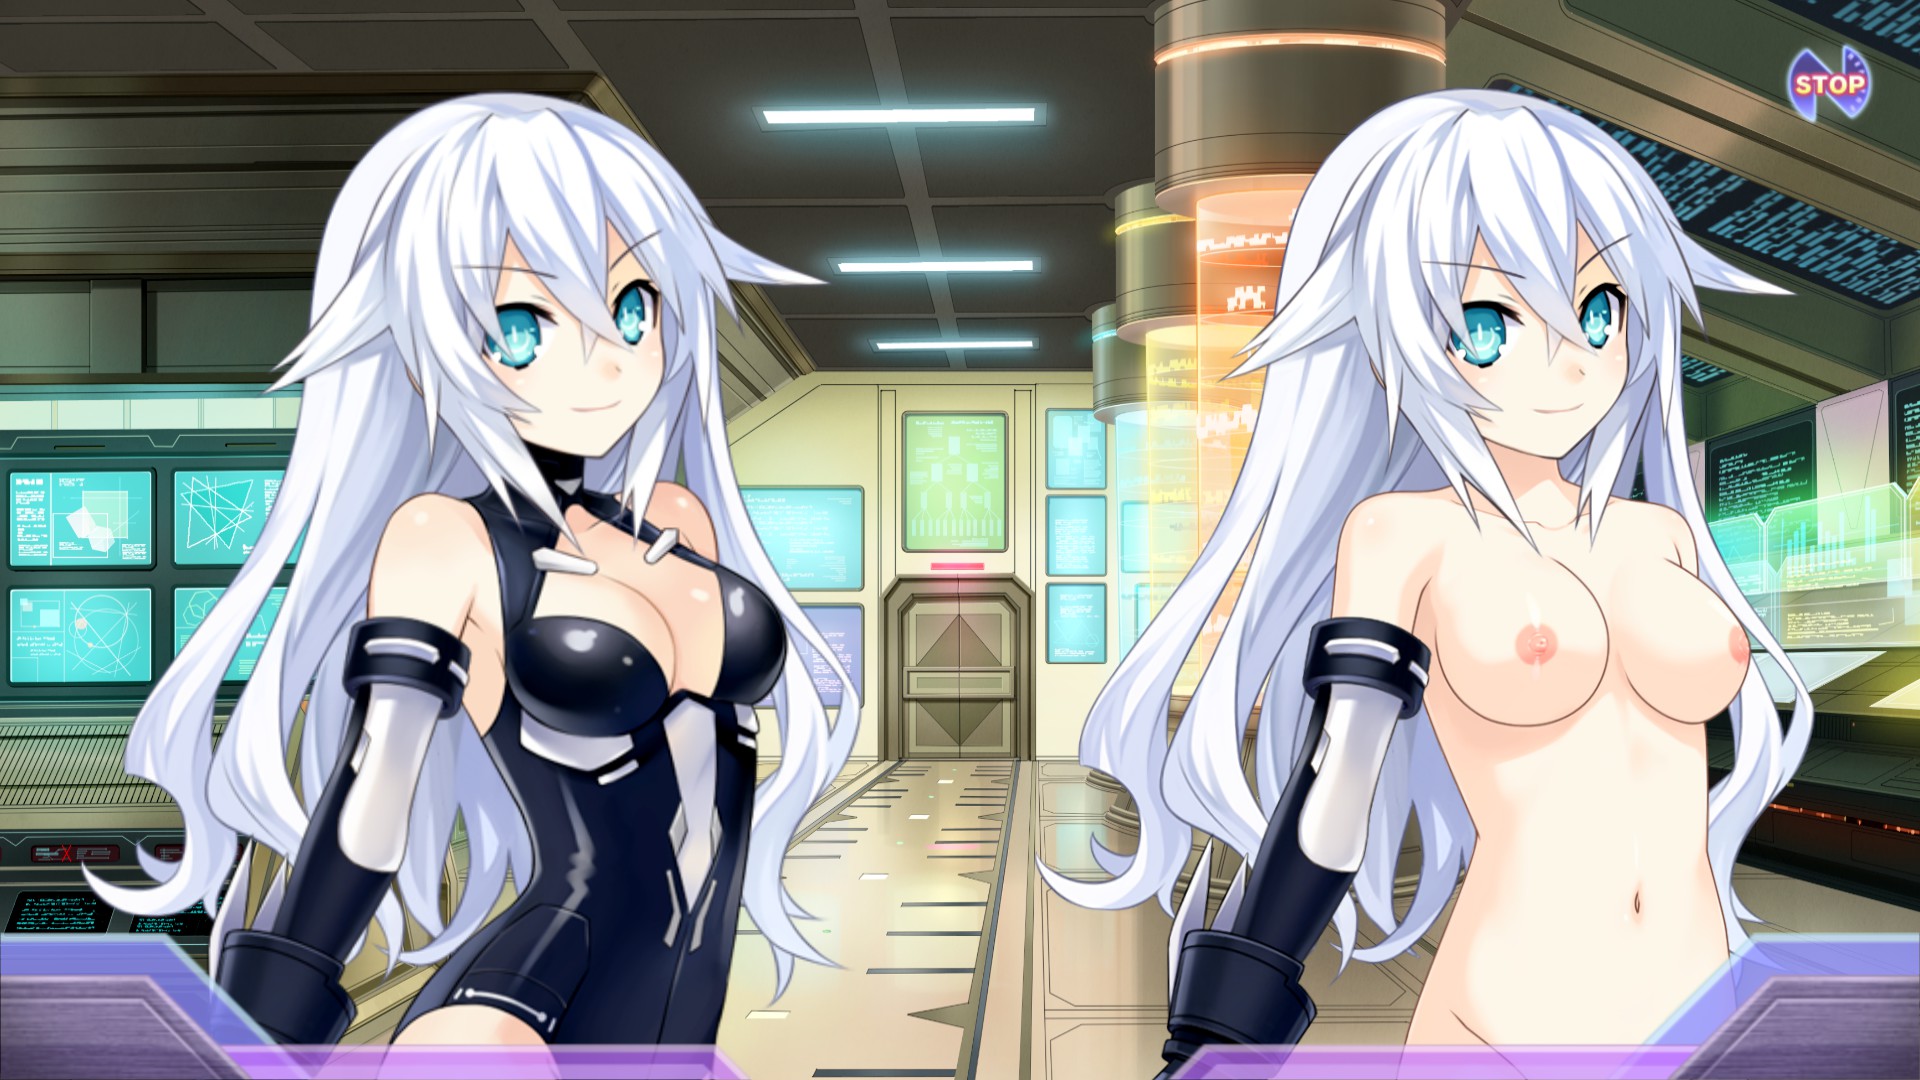
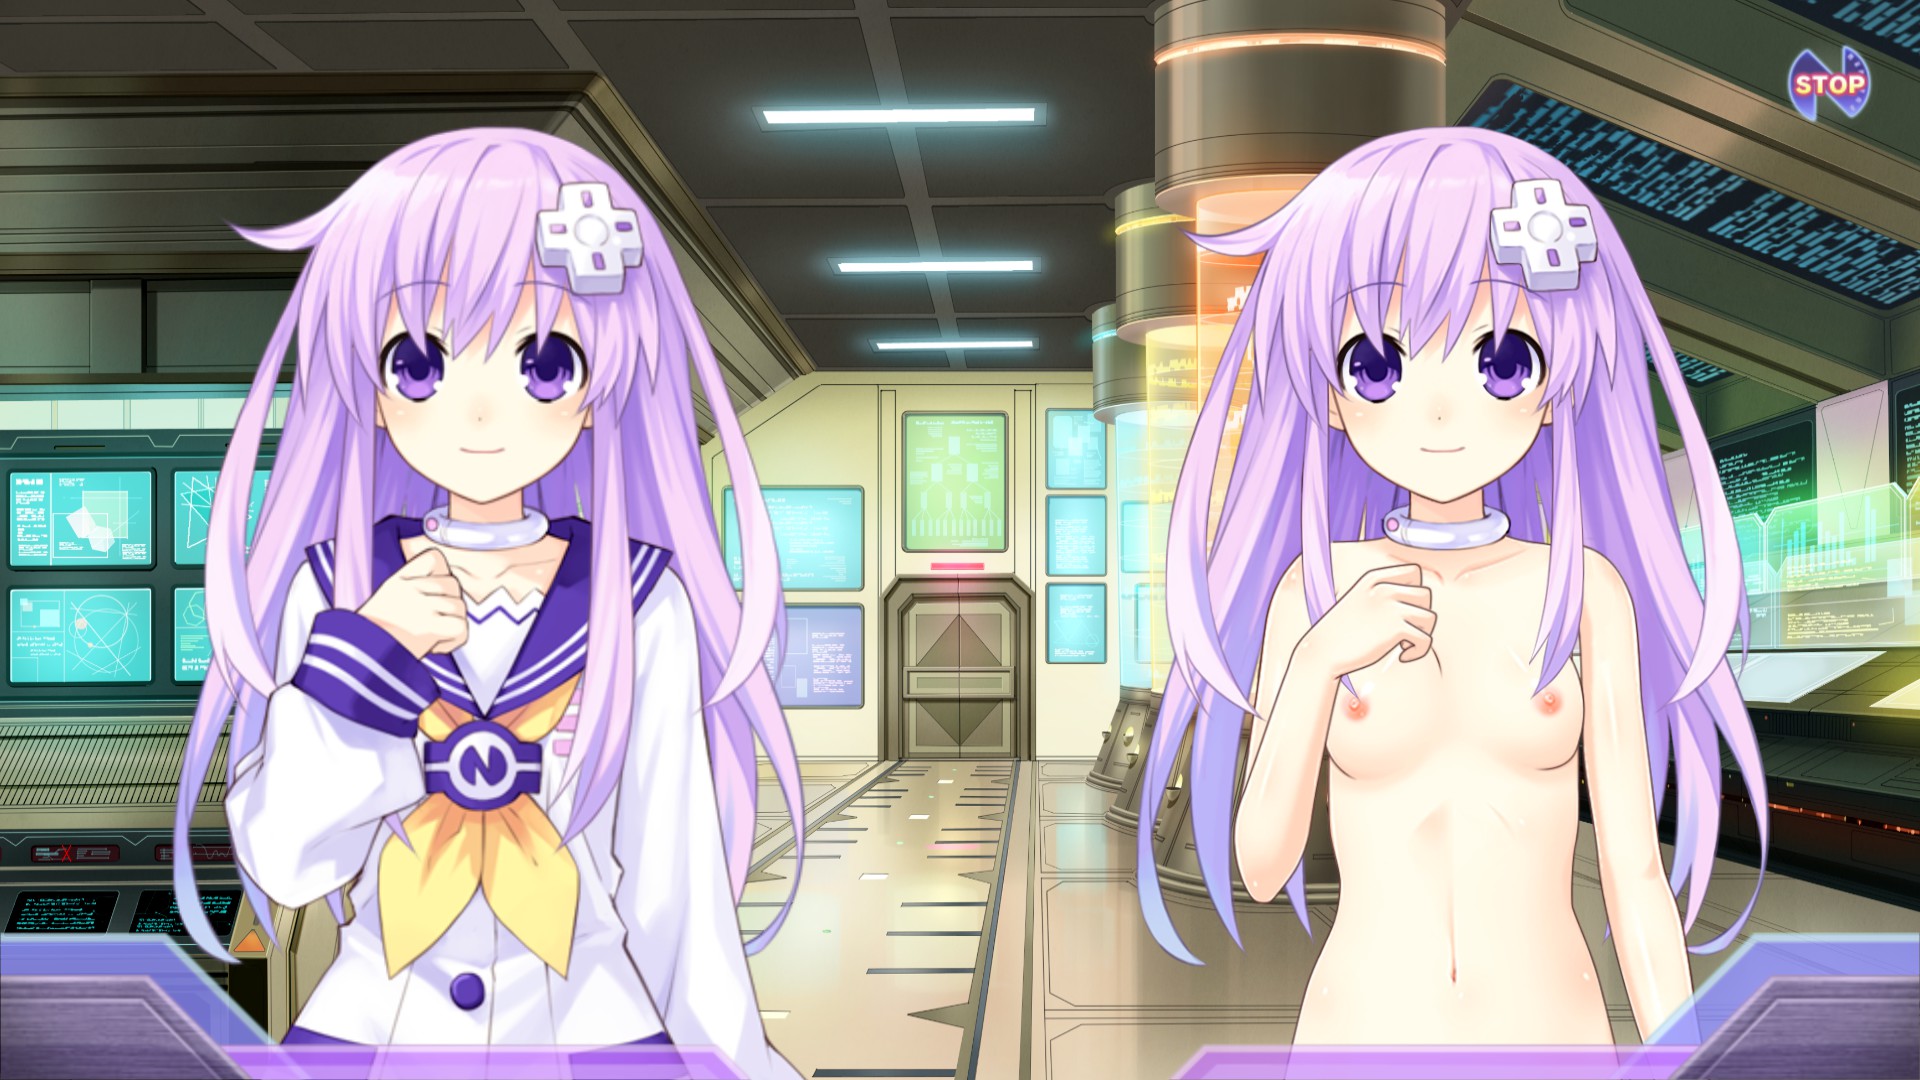
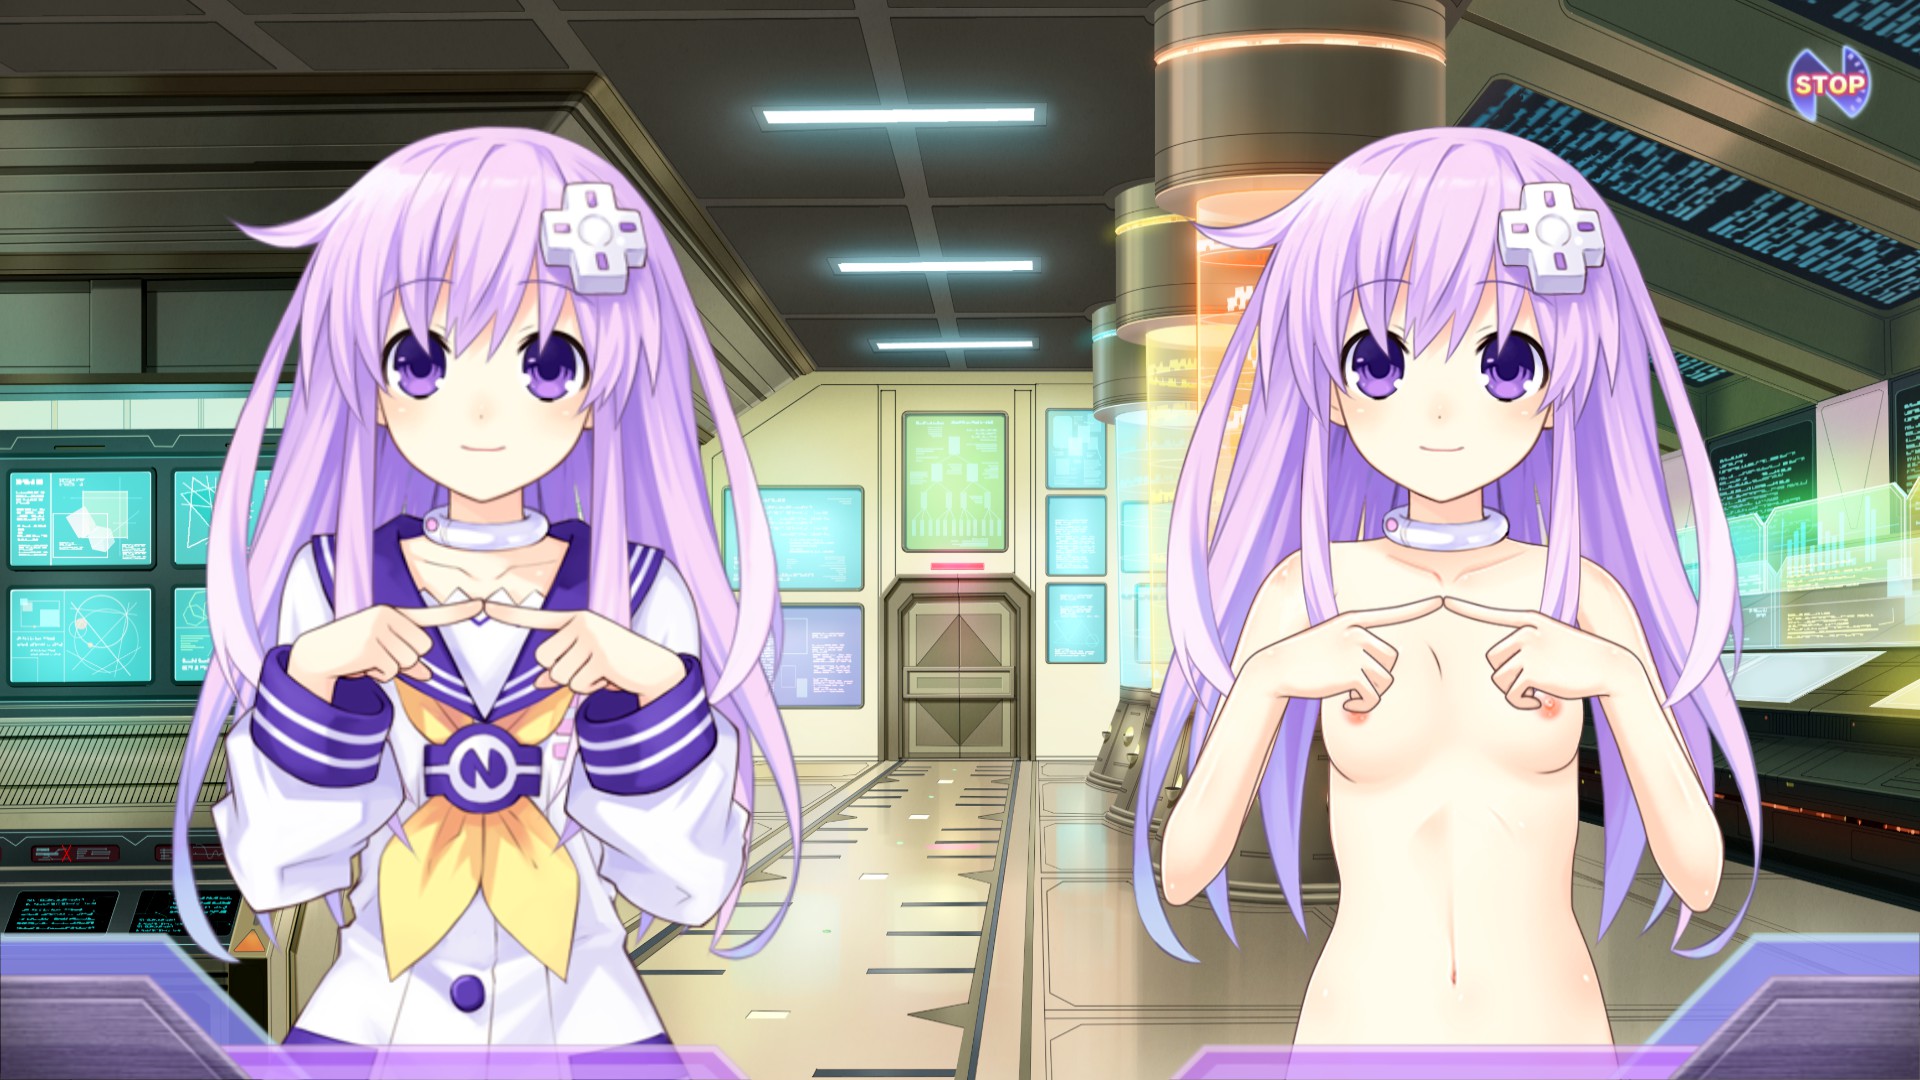
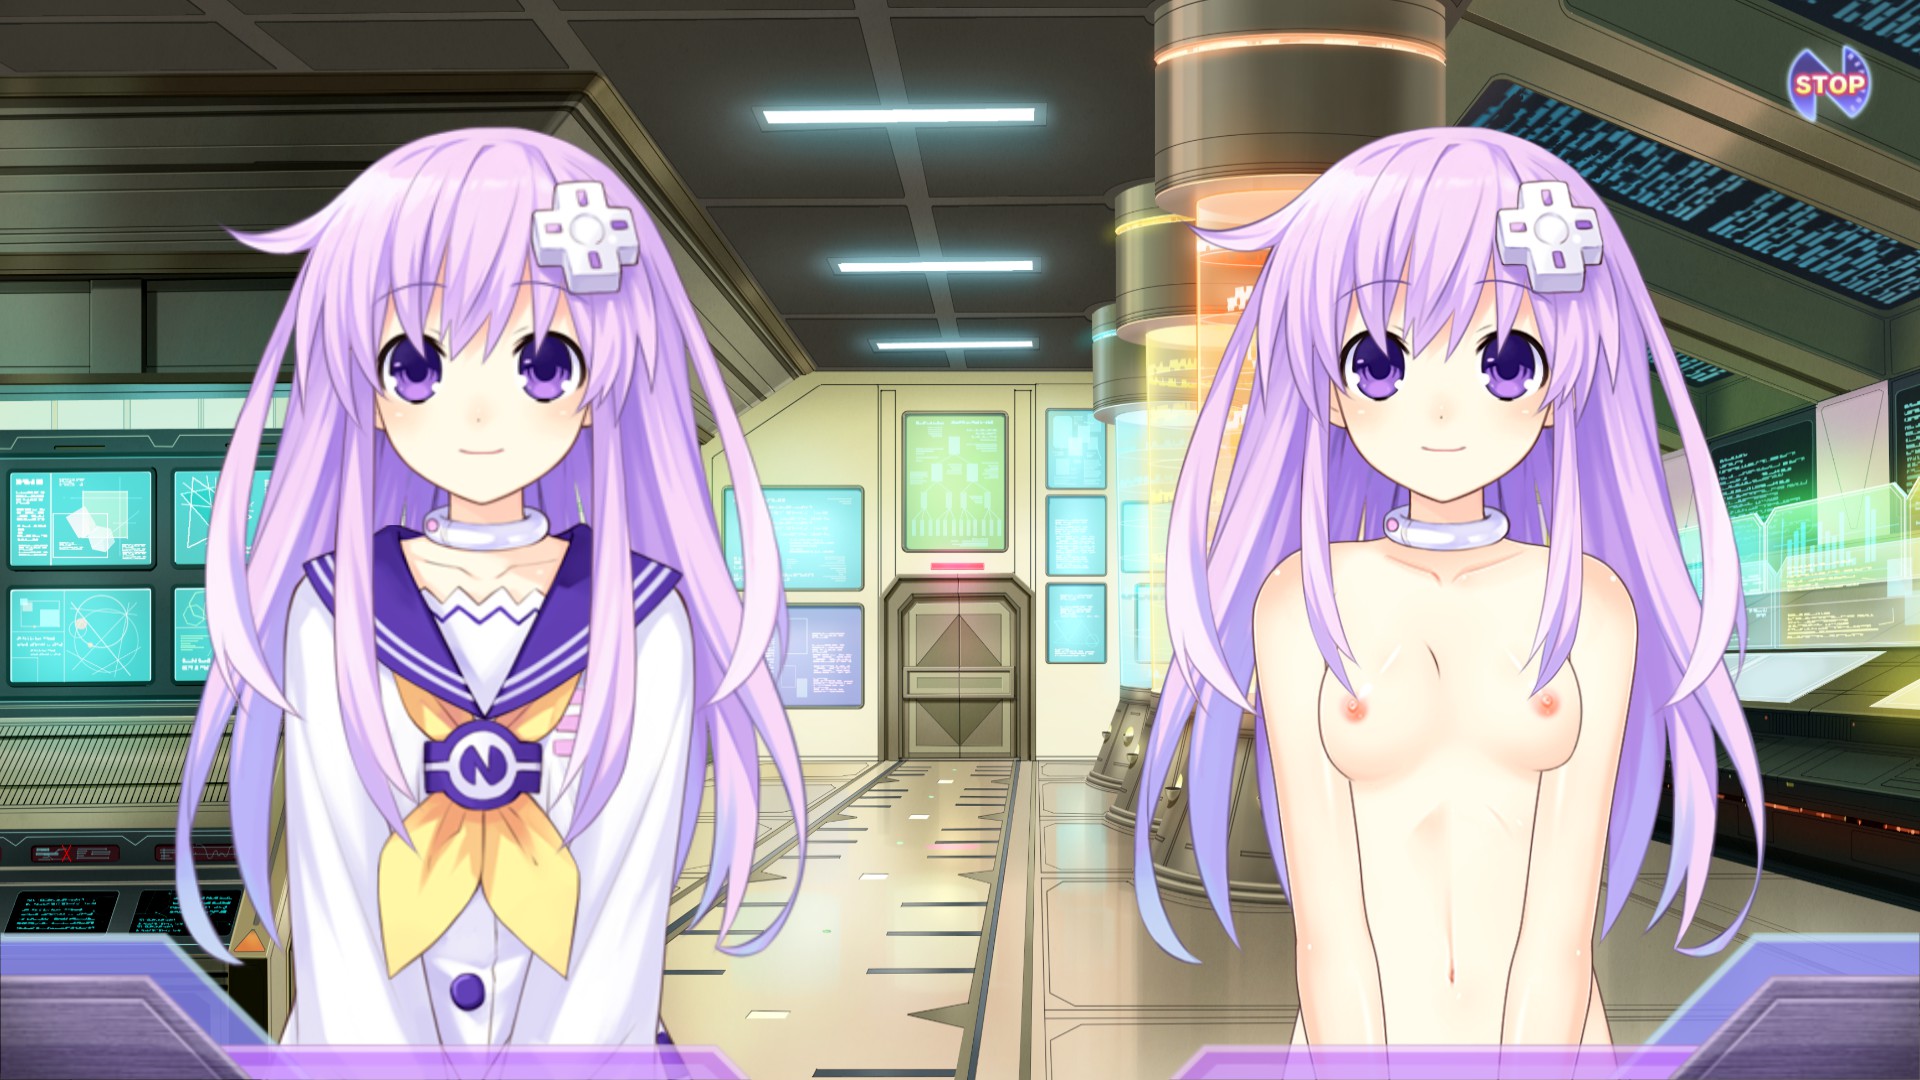
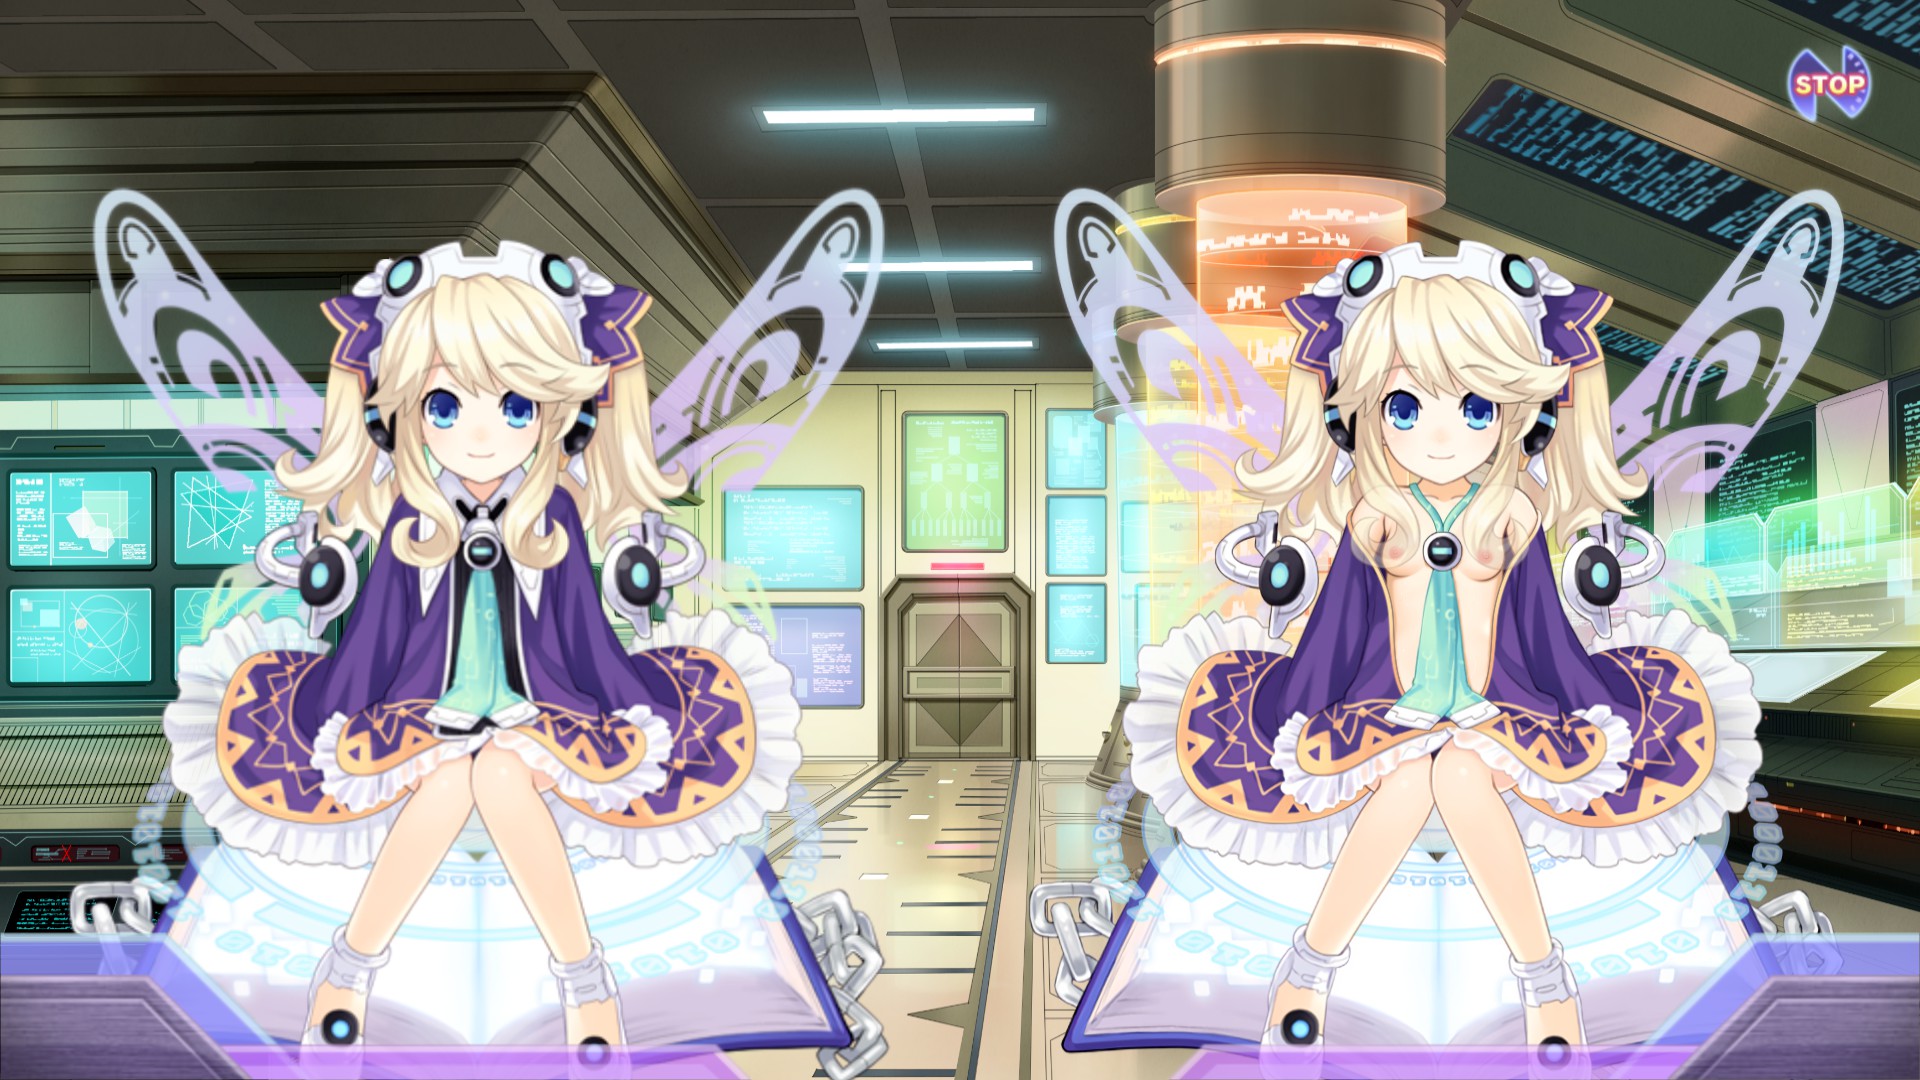
After finishing a first version of White Heart's texture and inserting it back into the game, I noticed that her right arm was missing and the right nipple was cut in half.
I had already come across a similiar issue while playing with the original patch, where the texture on Cyberconnect2 was clipped.

When I first saw that, my assumption was that the texture would simply be clipped at a rectangle, so each layer would have a rectangular bounding box in UV space, and only the texture area inside that box would be visible in the game. This is how all the previous texture atlas implementations worked that I had encountered before.
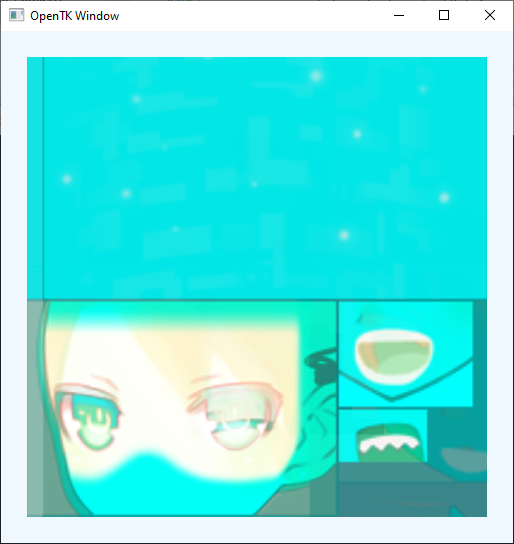
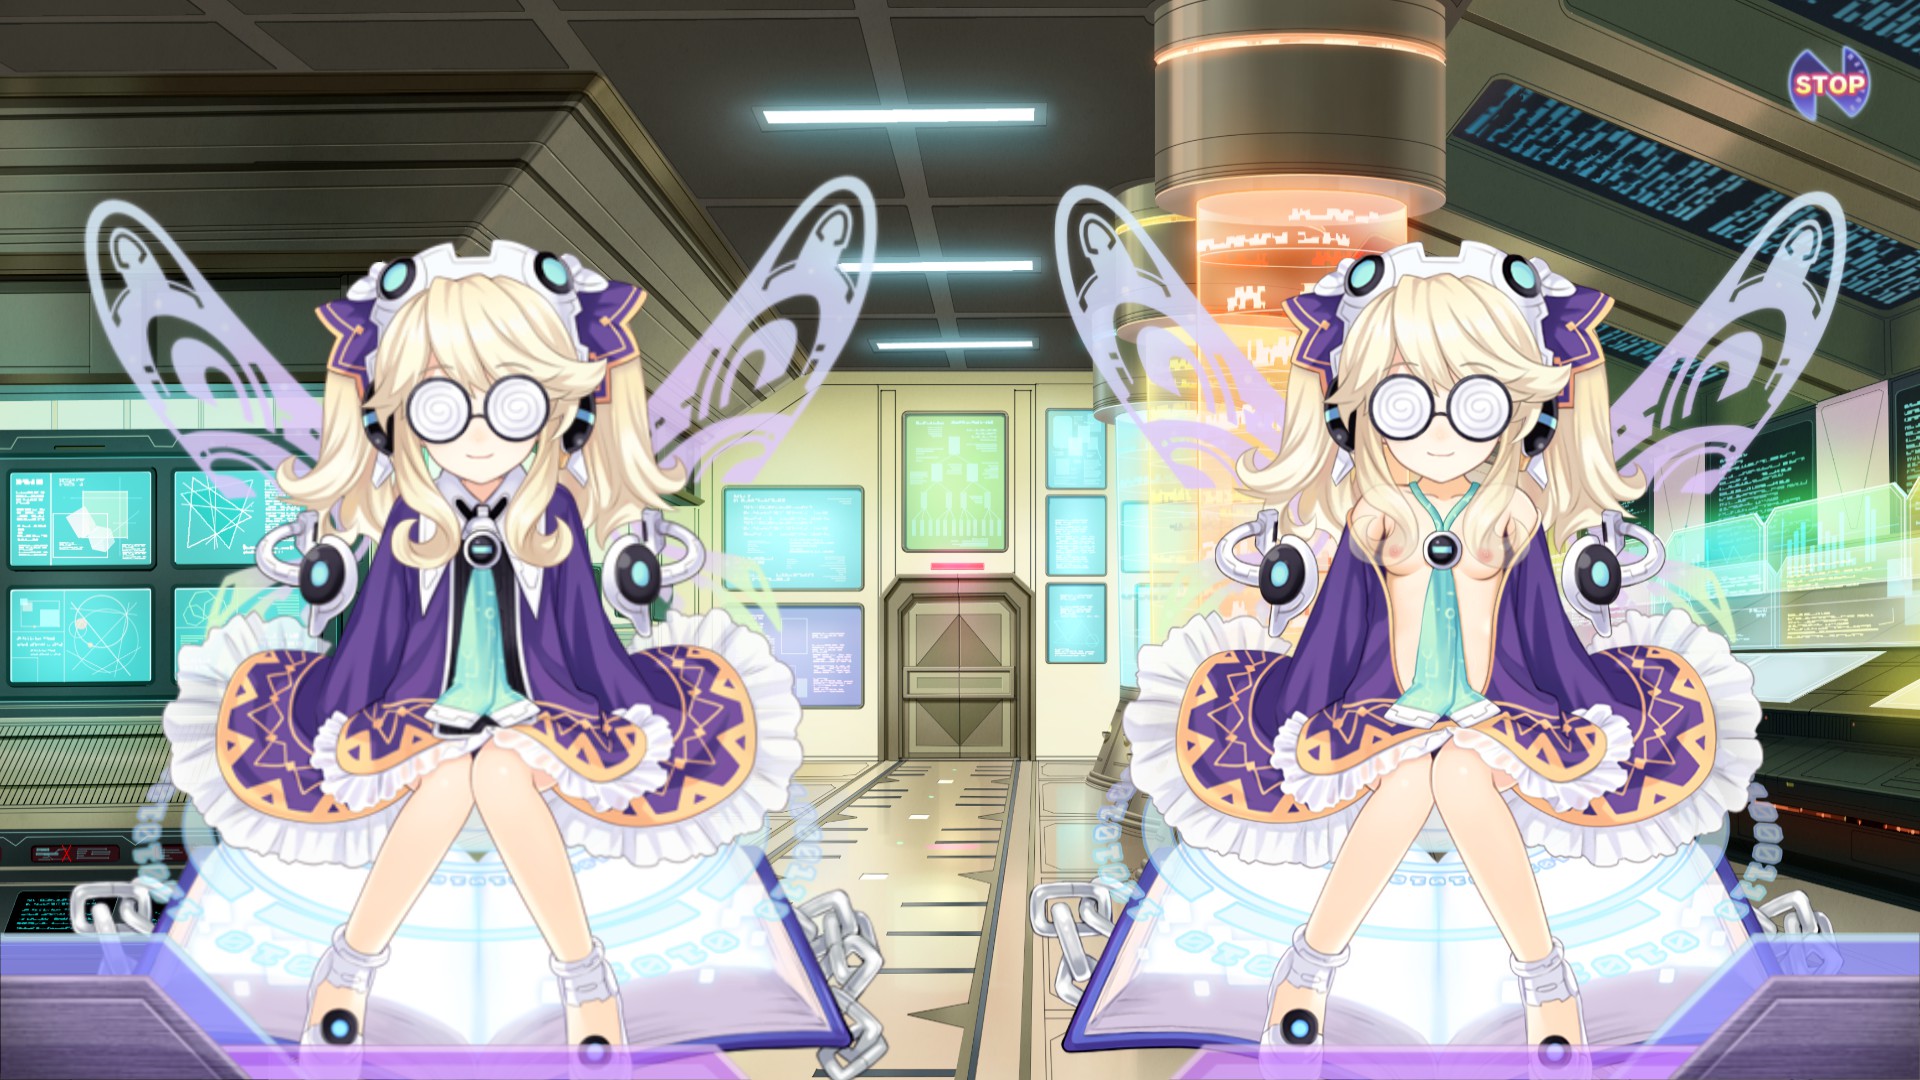
My immediate reaction was to add an opaque background to the texture, which would allow me to more easily identify these boundaries. Imagine my surprise when this showed up in the game:
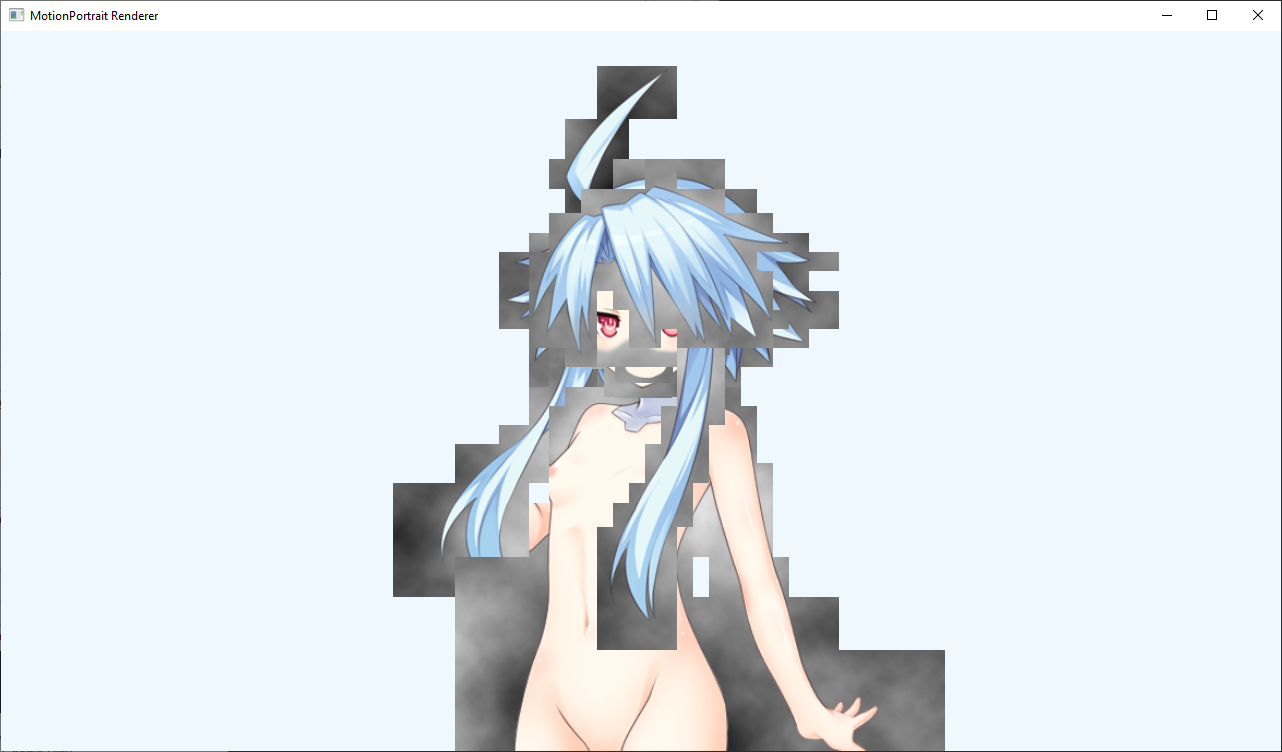
No simple rectangles in sight, instead each body part had a blocky outline made up of hundreds of smaller rectangles with varying sizes.
This is the point in time where I first shifted my attention to the face.mpb file accompanying the texture. Looking at the byte value distribution (and ignoring zero), there were significant spikes for 0x3f and 0x80. This is a strong indicator that the file contains a lot of floating point values, as 0x3f800000 is the IEEE 754 representation of the value 1. 0x3f in particular is the first byte for all floating point values beween 0.5 and 1. The next highest count was for the byte value 0x3e, which is the first byte of floats between 0.125 and 0.5.

So in conclusion, the file seemed to contain lots and lots of floating point numbers between 0 and 1, which is exactly the value range one would expect for UV coordinates.
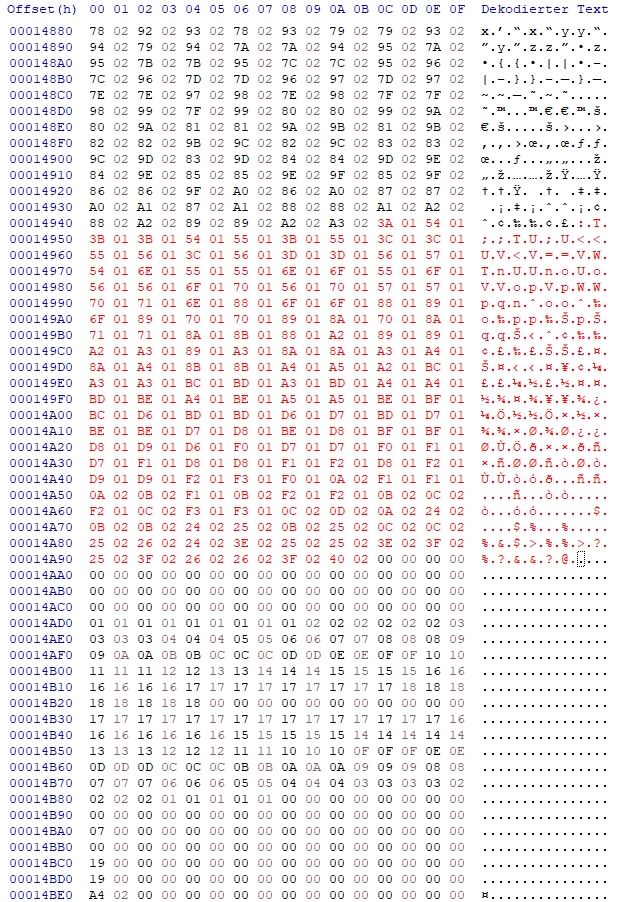
Taking a look at the data itself verified the assumption. Note how almost every fourth byte is either 0x3f or 0x3e.

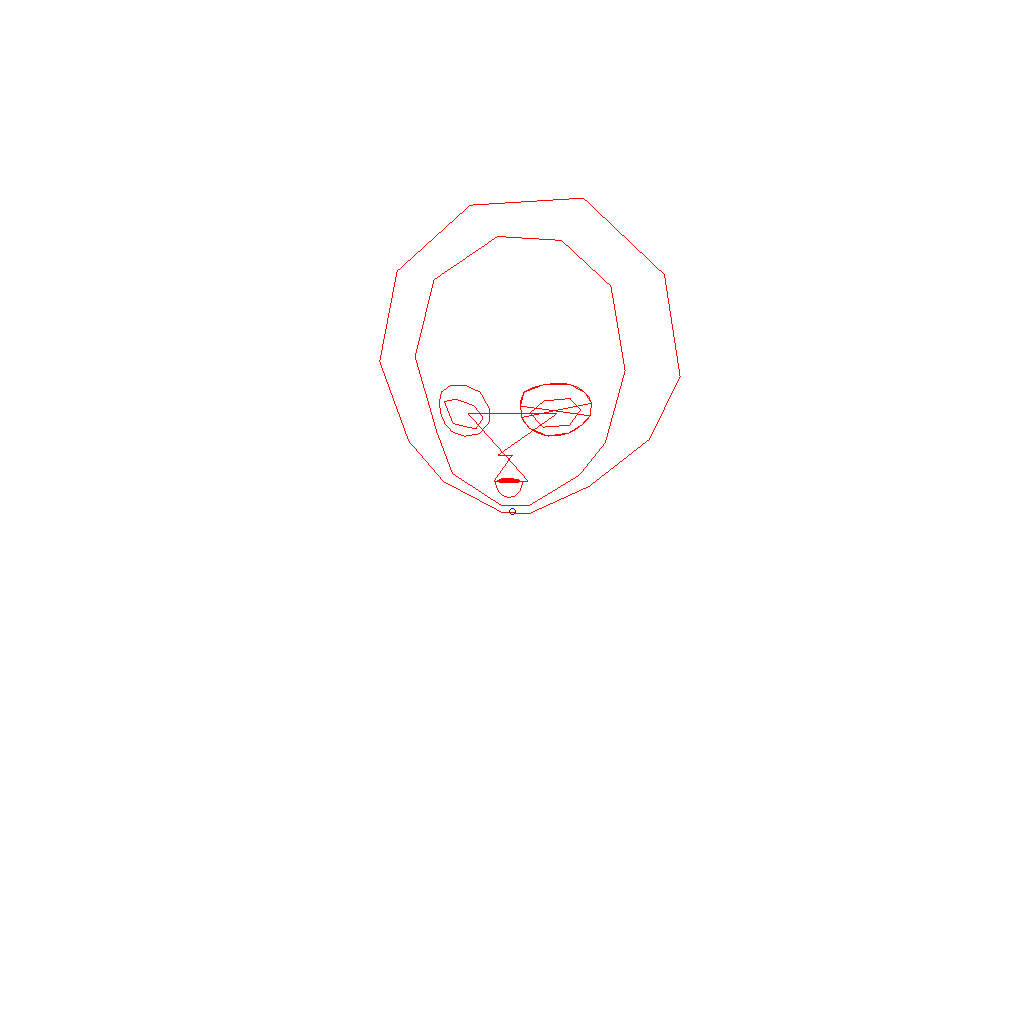
A bit of experimentation showed that close to the start of the file, there is a block of 20 polygons. The 0x0000000C at offset 0x80 being the number of points (here 12), followed by twice as many float values, each pair describing the position of one point.
Plotting all of these polygons revealed the shape of White Heart's head and face.
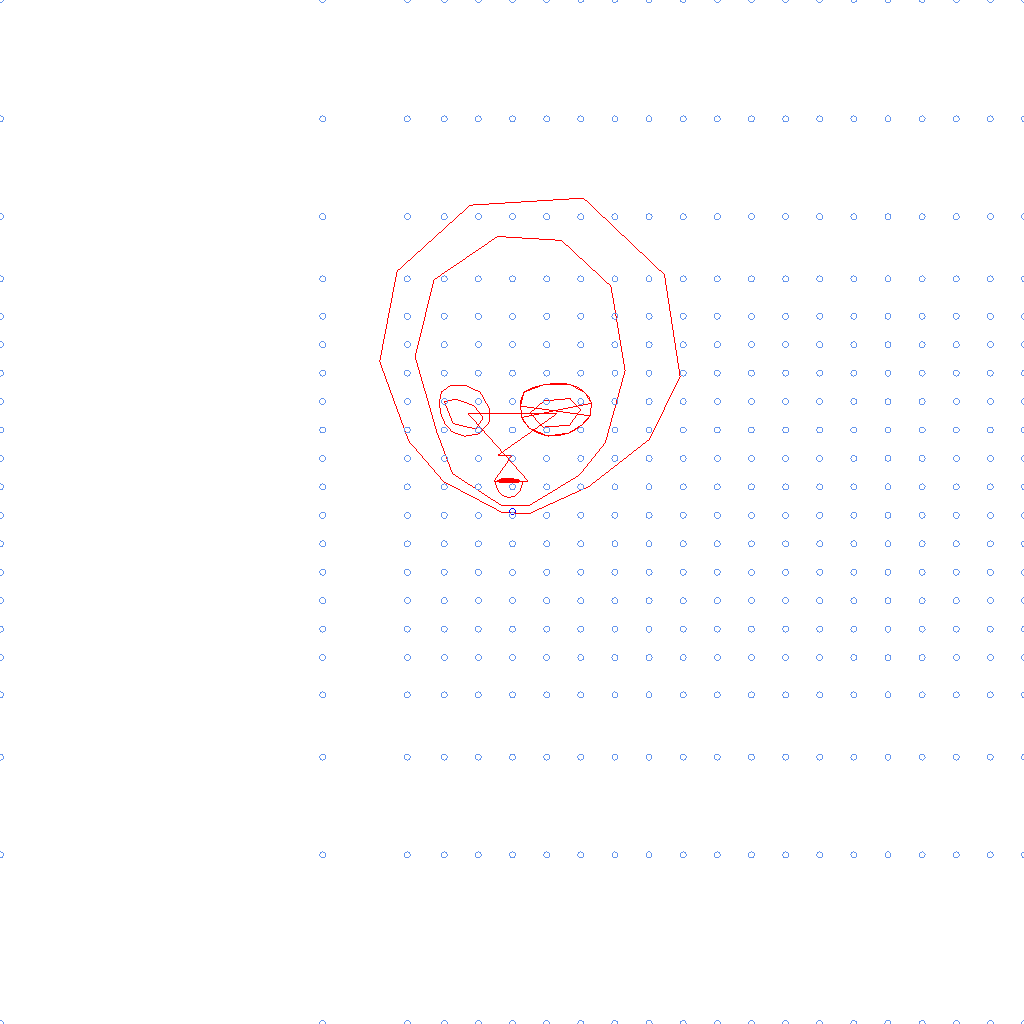
Digging a bit further through the files I found huge patches of several hundreds of floats. Plotting these as well revealed semi-regularly spaced grids of points.
When I first saw these, I assumed they were transformation grids for the breathing animations. While not entirely correct, this turned out to be pretty close to the truth.
While reading one the few forum posts about the game files, I stumbled over the name "Motion Portrait". Turns out this is the name of the library powering all of the 2D character animations.
The developers' website advertises a free evaluation SDK, but they never responded to my request for a copy. Luckily, someone apparently uploaded a version of the SDK to GitHub, albeit without the manual the website was talking about.
While it was possible to make some deductions about the file format by just staring at it in a hex editor, the meaning of the vast majority of data was still unknown at this point. So I decided it was time to give in and fire up the dissassembler.
One of the first things I always do when tackling a new engine is to set a breakpoint on the CreateFile function, as this is the WinApi entry point used by most engines to open files.
Following the control flow from there usually leads to the archive IO logic, which in most cases is fairly straightforward and therefore a good way to get familiar with the engine.
Not so much in this case. The engine seems to have multiple file system implementations cross-referencing each other in a pretty confusing manner. This is made worse by the fact that some IO is asynchronous (running on a separate thread) and everything is callback-based. The callback is invoked once the file is loaded into memory, and contains the parsing logic. The issue is that since this is happening asynchronously, it is not immediately obvious what triggered the IO request in the first place. I solved this by executing the parsing logic, setting a hardware breakpoint on the decoded data and resuming until the invoking thread accesses the results of the IO operation.
As an aside, the engine seems to go a bit overboard with the use of multithreading, completely flooding the debug output with thread creation and termination messages. I even think it might have its own usermode scheduler implementation for animation threads, though this is speculation as I didn't continue following that part of the logic.
Now to the actual MPB loading (all names are guesses):
Character::LoadFaceFile is invoked on a character structure, resolves the archive id and file name of the mpb file and calls LoadMpbFile with this information.LoadMpbFile initializes a callback structure with a pointer to the character structure and the function MpbFileLoadCallback and passes it to TryLoadFileFromArchive.TryLoadFileFromArchive sets in motion the whole IO action, which eventually results in MpbFileLoadCallback being called.MpbFileLoadCallback passes control to MotionPortrait::ParseMpb.MotionPortrait::ParseMpb invokes MotionPortrait::ParseHeader, MotionPortrait::Parse, MotionPortrait::InitializeBuffers and MotionPortrait::ParseAdditionalData.With a cleaned decompilation output of over 1500 lines, MotionPortrait::Parse is by far the longest of these methods. Decyphering the logic was additionaly complicated by the fact that the code is heavily optimized, resulting in non-standard calling conventions for many function and tons of shifted pointers. The parsing logic is also littered with conditional logic for different versions of the file format, so I decided to limit my investigation to version 37, which is used by the game.
I don't remember much detail of the process that followed this discovery, except that there were about two weeks of me constantly switching between the parsing, transformation, and rendering logic, trying to identify as many fields as possible on the dozens of structures involved.
The most relevant parts of the format are meshes and layers. Each mesh contains a grid of vertices (the ones I previously identified as "transformation grids"), and two lists of 16 bit integers. Each layer has an id and holds an index into the mesh array, as well as a bounding box used to calculate the UV coordinates from the mesh vertices.
About the 16 bit integer lists attached to the meshes: The second one is passed to glDrawElements in the game, so it was easy to identify it as the list of mesh indices. The first one's purpose was still unknown at this point, I only knew it was always shorter than the first one and using it as triangle indices didn't result in anything recognizable.
Eventually I was able to parse the complete file and cobble together a some hacky rendering logic using OpenTK.

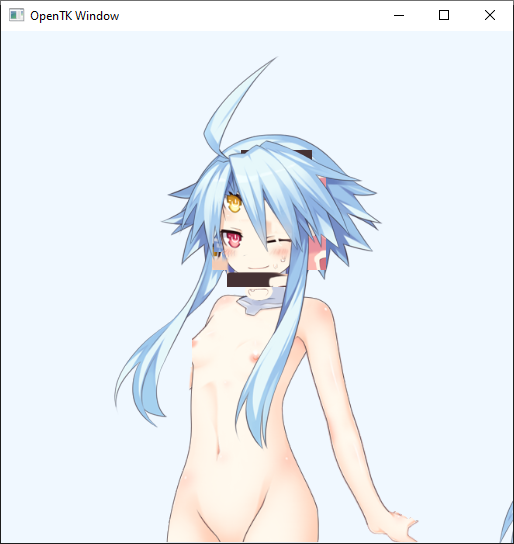

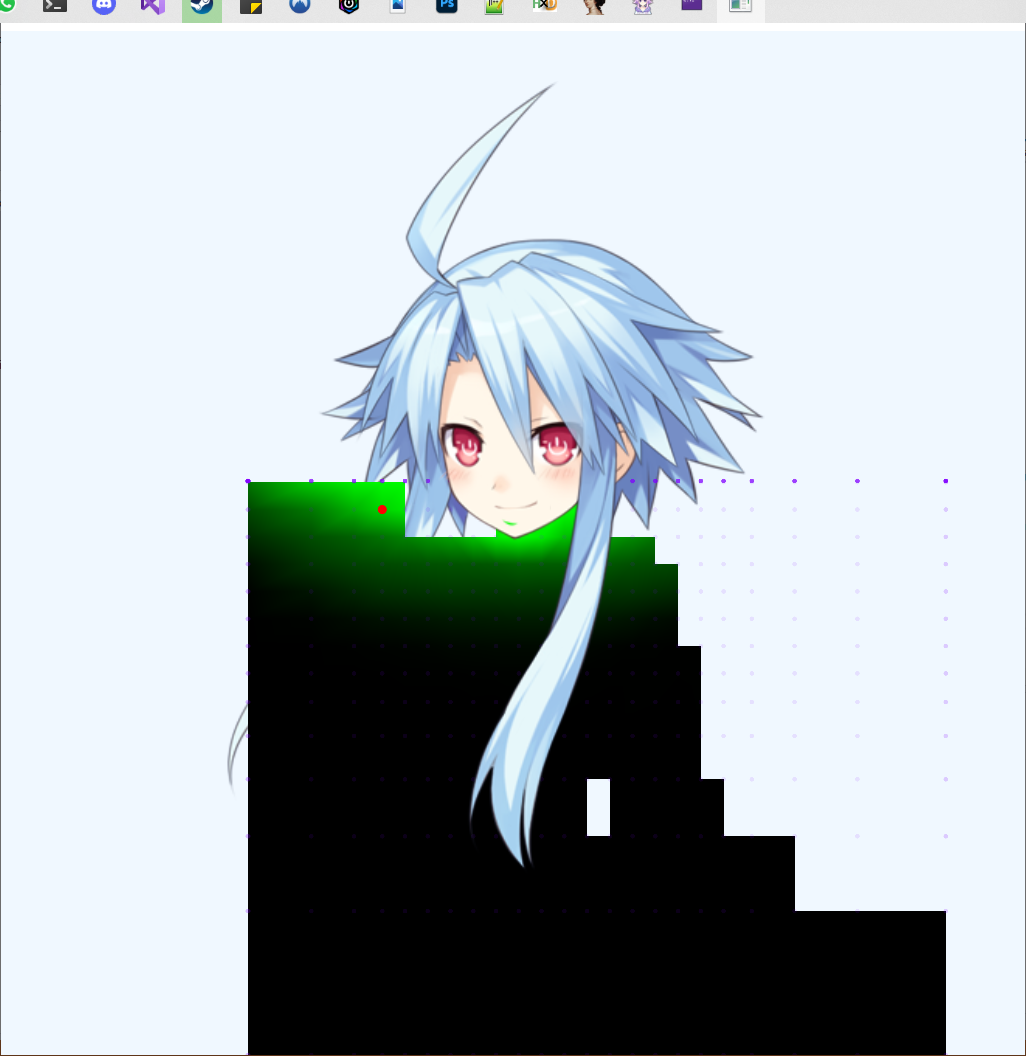
Using a second fragment shader, I made the mesh wireframe visible, which displayed the source of the blocky outline I encountered earlier with the cloud texture. So now the challenge would be to extend this mesh to contain the area left to White Heart.
The first step I took was to try adding a new quad to the mesh. This would mean extending the vertex list by four x/y pairs and adding 6 indices (two triangles) to the index list. This worked surprisingly well, and just like that, a new square appeared in the render shown in the second image (ignore the orange triangles).
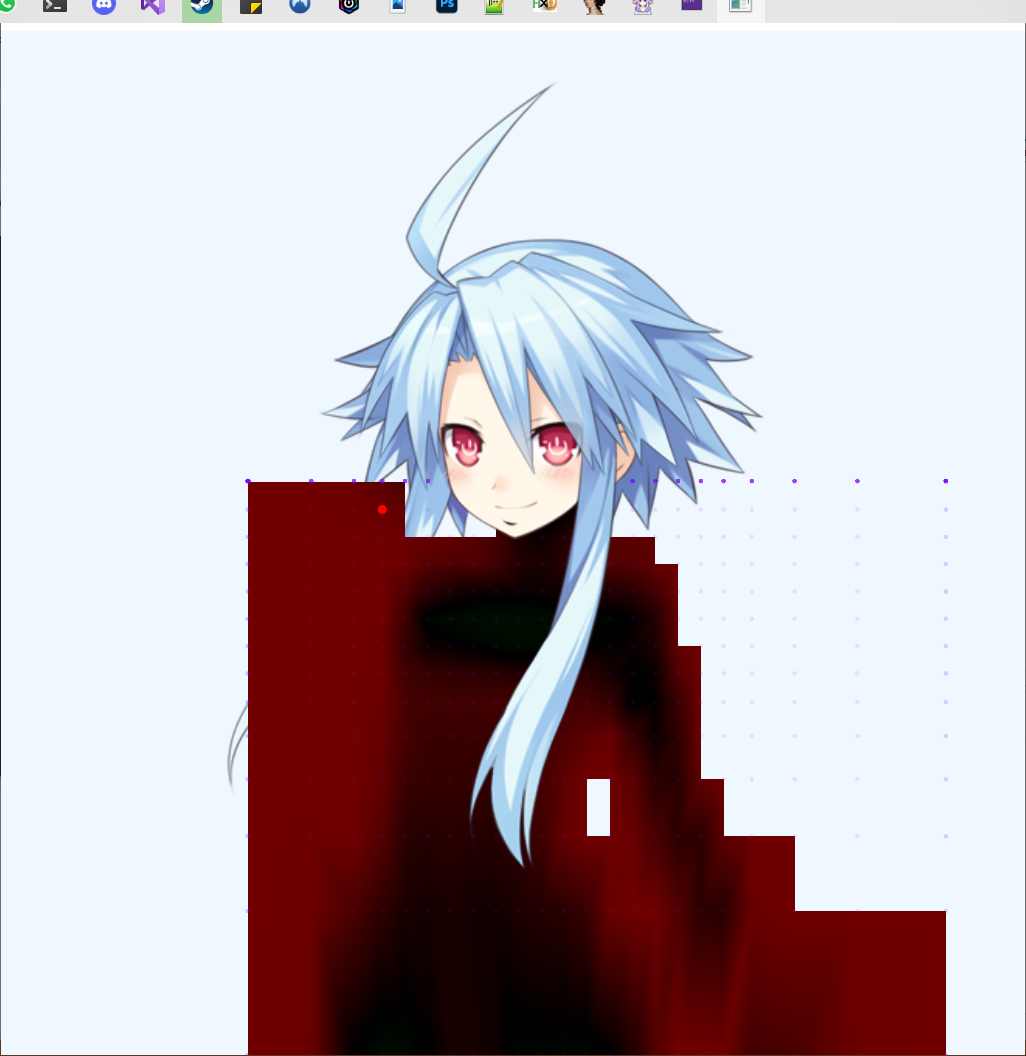
So next I wanted to figure out the coordinates of neighboring quads, so I could create new ones in the right places. Instead, I discovered that the vertex list actually contains all grid positions, even those not used by the mesh. The third image shows all vertex positions.
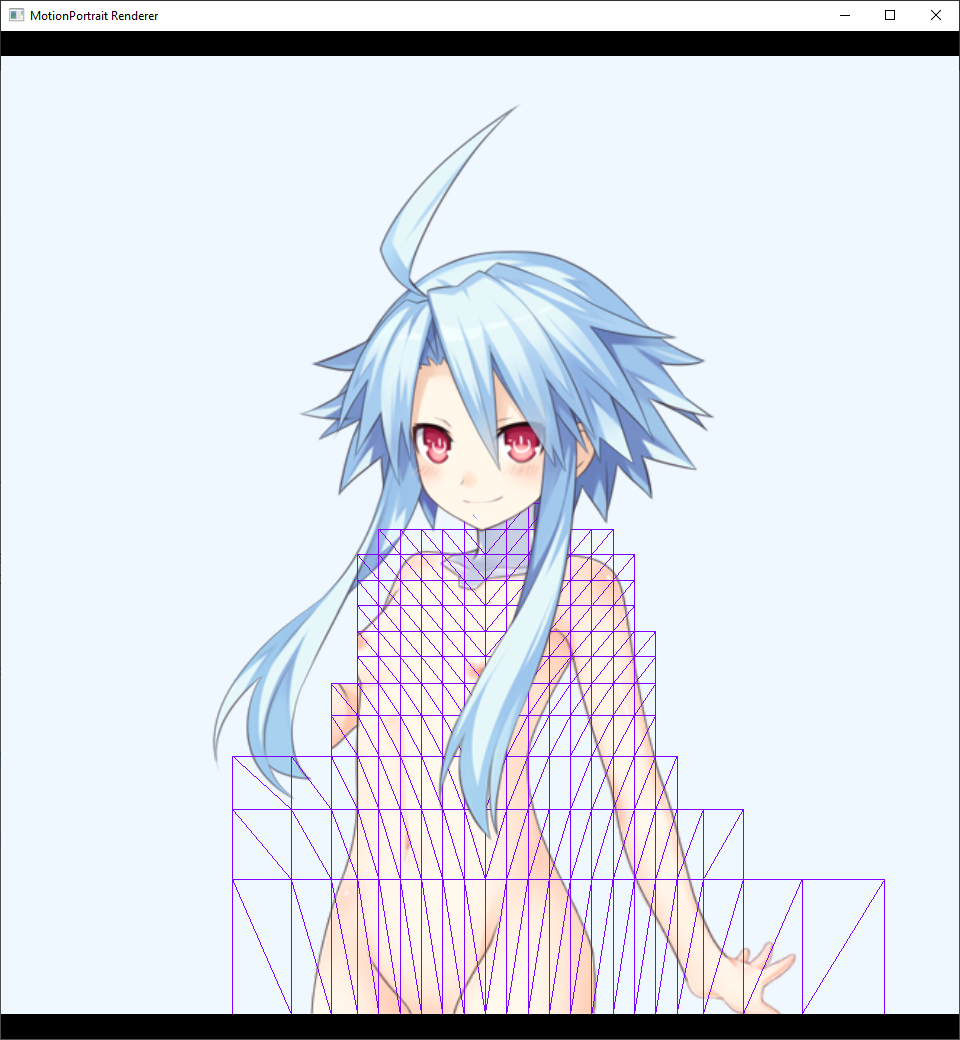


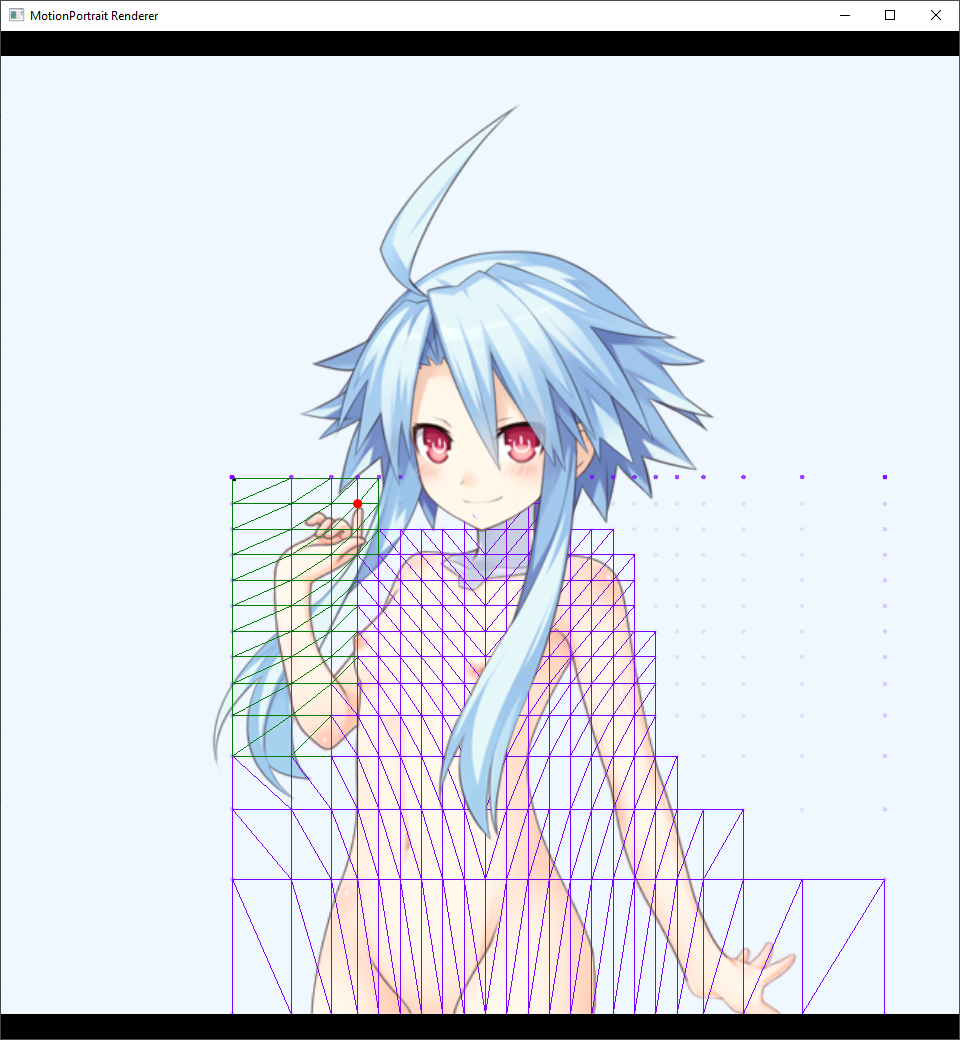
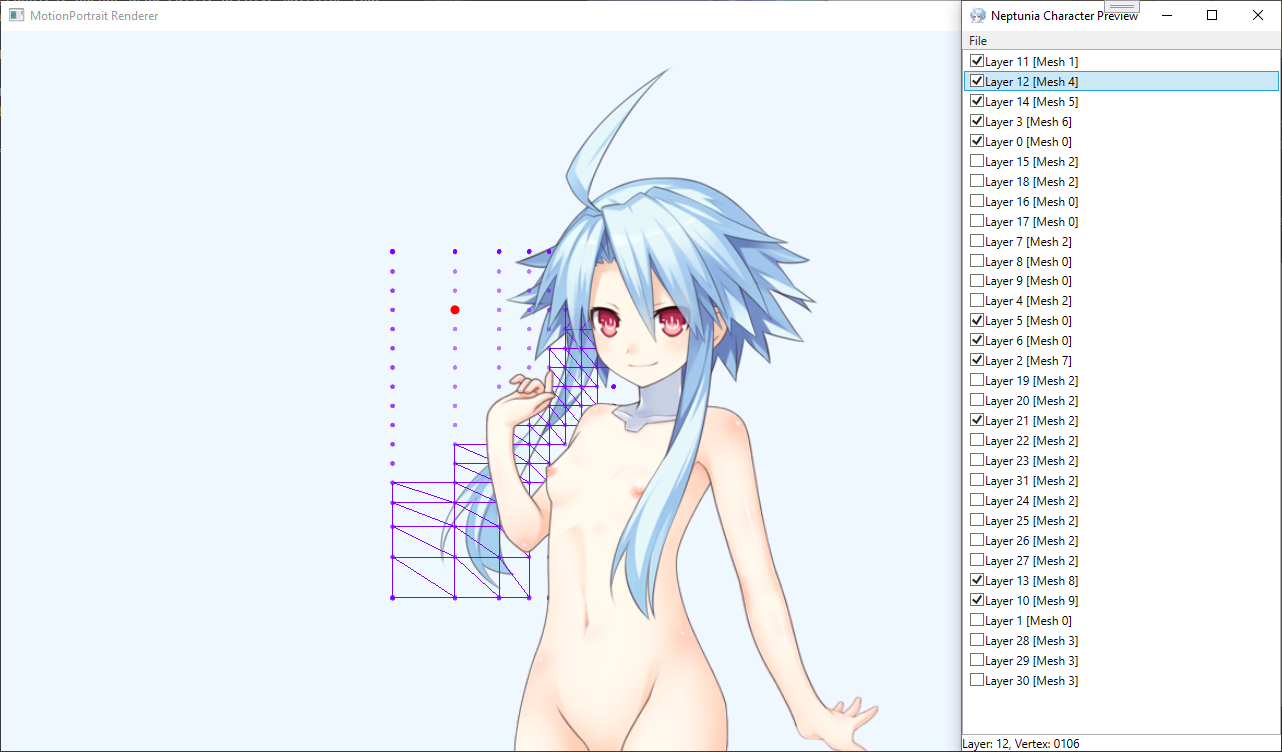
I quickly added some logic to let me highlight the vertex with a specific index, so I could quickly determine the indices I would need for the new quads.

After sorting through all of these indices and rearraging them into overlapping groups of 6 (praise rectangular text selections!), I was finally ready to insert them into the .mpb file.
grid (42 indices):
3A01    3B01    3C01    3D01
5401    5501    5601    5701
6E01    6F01    7001    7101
8801    8901    8A01    8B01
A201    A301    A401    A501
BC01    BD01    BE01    BF01
D601    D701    D801    D901
F001    F101    F201    F301
0A02    0B02    0C02    0D02
2402    2502    2602    ----
3E02    3F02    4002    ----
triangles (168 indices)
3A01    5401    3B01    3B01    5401    5501
3B01    5501    3C01    3C01    5501    5601
3C01    5601    3D01    3D01    5601    5701

5401    6E01    5501    5501    6E01    6F01
5501    6F01    5601    5601    6F01    7001
5601    7001    5701    5701    7001    7101

6E01    8801    6F01    6F01    8801    8901
6F01    8901    7001    7001    8901    8A01
7001    8A01    7101    7101    8A01    8B01

8801    A201    8901    8901    A201    A301
8901    A301    8A01    8A01    A301    A401
8A01    A401    8B01    8B01    A401    A501

A201    BC01    A301    A301    BC01    BD01
A301    BD01    A401    A401    BD01    BE01
A401    BE01    A501    A501    BE01    BF01

BC01    D601    BD01    BD01    D601    D701
BD01    D701    BE01    BE01    D701    D801
BE01    D801    BF01    BF01    D801    D901

D601    F001    D701    D701    F001    F101
D701    F101    D801    D801    F101    F201
D801    F201    D901    D901    F201    F301

F001    0A02    F101    F101    0A02    0B02
F101    0B02    F201    F201    0B02    0C02
F201    0C02    F301    F301    0C02    0D02

0A02    2402    0B02    0B02    2402    2502
0B02    2502    0C02    0C02    2502    2602

2402    3E02    2502    2502    3E02    3F02
2502    3F02    2602    2602    3F02    4002
Et voilà! My renderer showed the texture in its entirety.
Now that I had a proof of concept, the next logical step was to get the file back into the game to check if it would work there as well. The issue: The .mpb files were compressed before they were stored in the archives, and of course the game uses a proprietary compression algorithm.
Oh well, adding those indices had increased the file size anyway, so simply overwriting the data wouldn't have been an option in the first place. I would just have to swallow the pill and write an inserter for .pac archives.
A quick glance at the QuickBMS script showed the compression type neptunia and searching for that in the source files lead me to neptunia.c, which contained the decompression implementation. It's some variation of Huffman compression (the engine uses a class called CDivideHuffman), but I didn't see a simple way of reversing the algorithm, so the files would need to be stored uncompressed. Luckily this would just require a flag to be changed in the corresponding entry of the archive index, which I would need to rewrite anyway.
So yes, replacing a file within the archive is pretty simple. First, read the archive index, locate the file to be replaced and compare the old and new size. Then, move all files after the one in question either forwards or backwards to provide the necessary space. Don't forget to adjust the start offset of these files in the index. Finally, overwrite the data of the file itself, change the compression flag and size in the index, and flush everything to disk.
Now, to my surprise I noticed the .NET runtime does not seem to have a builtin way to "memmove" data within a stream, so I had to implement this as well. I did however make a stupid mistake in the implementation. Can you spot it?
private static void MoveStreamData(Stream stream, long srcOffset, long dstOffset, int size) {
    const int blockSize = 4096;
    var buffer = new byte[blockSize];

    void MoveBlock(long src, long dst, int count) {
        stream.Seek(src, SeekOrigin.Begin);
        stream.Read(buffer, 0, count);
        stream.Seek(dst, SeekOrigin.Begin);
        stream.Write(buffer, 0, count);
    }

    int blocks = size / blockSize;
    int remaining = size % blockSize;

    if(srcOffset > dstOffset) {
        // moving forwards, so start at the end
        MoveBlock(srcOffset + blocks * blockSize, dstOffset + blocks * blockSize, remaining);
        for(int i = blocks - 1; i >= 0; i--) {
            MoveBlock(srcOffset + i * blockSize, dstOffset + i * blockSize, blockSize);
        }
    }
    else {
        // moving backwards, so start at the beginning
        for(int i = 0; i < blocks; i++) {
            MoveBlock(srcOffset + i * blockSize, dstOffset + i * blockSize, blockSize);
        }
        MoveBlock(srcOffset + blocks * blockSize, dstOffset + blocks * blockSize, remaining);
    }
}
In the above code, the condition srcOffset > dstOffset should say srcOffset < dstOffset. In other words, the logic always chooses the direction where data is lost while moving data. This caused me a couple of hours of game crashes and made me implement the decompression algorithm to get a peek inside of the .cpk files next to each .pac archive, in the hope that they would hold the answer to my problems. This was of course not the case, the .cpk files just contain a mapping that defines which file is located in which archive.
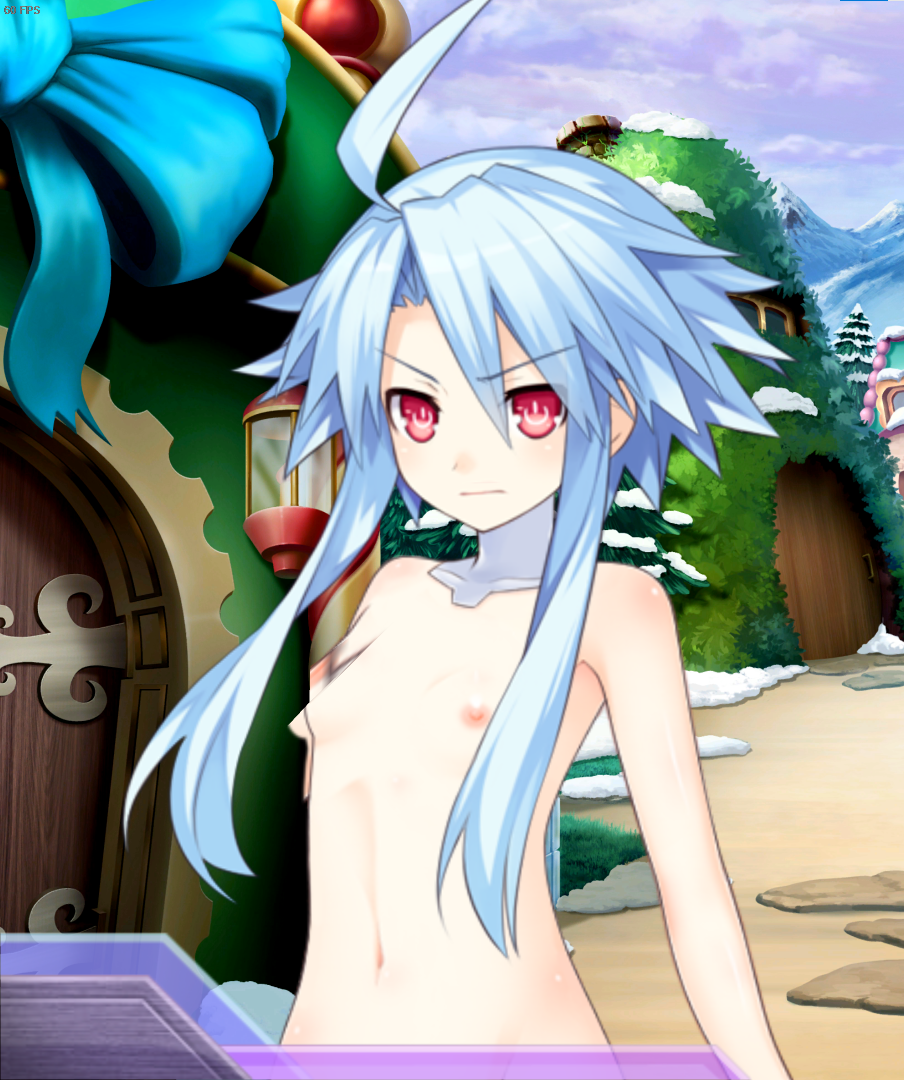
After discovering my mistake and slamming my face into the desk for a while, I was finally able to see the character in the game! Only to be immediately disappointed because it looked nothing like I expected.

In cases of glitchy rendering like this I would usually resort to RenderDoc, a brilliant graphics debugger that allows you to step through all the rendering stages while observing the inputs and outputs of each operation. Unfortunately, the game uses an ancient compatibility profile of OpenGL, which is not supported by RenderDoc. I tried my luck with ApiTrace, a similar tool specifically for OpenGL, but the results weren't that helpful.
So back to the drawing board. Time to have a closer look at the other parts of the file. I spent some time working my way through the matrix multiplications and transform calculations used to animate the characters, which gave me some much needed insight. First of all, two of the other buffers I had previously ignored turned out to be vertex weights, determining how much the animations would affect that vertex.
More importantly however, I realized that the vertex calculations were not performed for all vertices, but just a subset of them. Remember the first list of 16 bit numbers in each mesh? It is a list of 'active' vertices, all others are never calculated and therefore keep their default position of (0,0). This is what was causing the weird distortion around the border or the mesh, because the newly used vertices all defaulted to a position near White Heart's neck.
My renderer didn't perform any of the animation calculations, but uploaded the vertices to the GPU just how they were defined in the file, so the issue didn't occur there. The fix was simple, I would just need to append the missing vertices to that first index list.

And that did it, the sprite was now being displayed properly!

With the problem solved, I turned my focus to the code I had written while experimenting. It was a mangled mess of file parsing logic, GDI+ graphics, OpenGL draw calls, archive patching code and other stuff in between. So I spent a couple of days refactoring and rewriting everything.
While I was at it, I also build a simple WPF app to control the renderer, with the option to toggle each layer on and off, and highlight a layer/vertex. Since I would need to edit the meshes for other characters as well, I also added a display with the currently selected vertex index at the bottom.
0011 - Neptune
0021 - Purple Heart

0022 - Purple Heart (Next Form)
0091 - Noire

0094 - Noire (Glasses)
0101 - Black Heart
0131 - Vert
0133 - Vert (Glasses)

0141 - Green Heart
0171 - Blanc

0173 - Blanc (Glasses)

0181 - White Heart
0202 - Falcom
0211 - Nepgear (One Hand Up)
0212 - Nepgear (Fingers)
0213 - Nepgear (Arms Down)
0231 - Compa
0233 - Compa (Glasses)

0271 - IF
0311 - Histoire
0313 - Histoire (Glasses)
0431 - Arfoire

0531 - Broccoli
0541 - MarvelousAQL
0551 - Cyberconnect2
0561 - MAGES
0571 - Uni
0581 - Rom
0591 - Ram
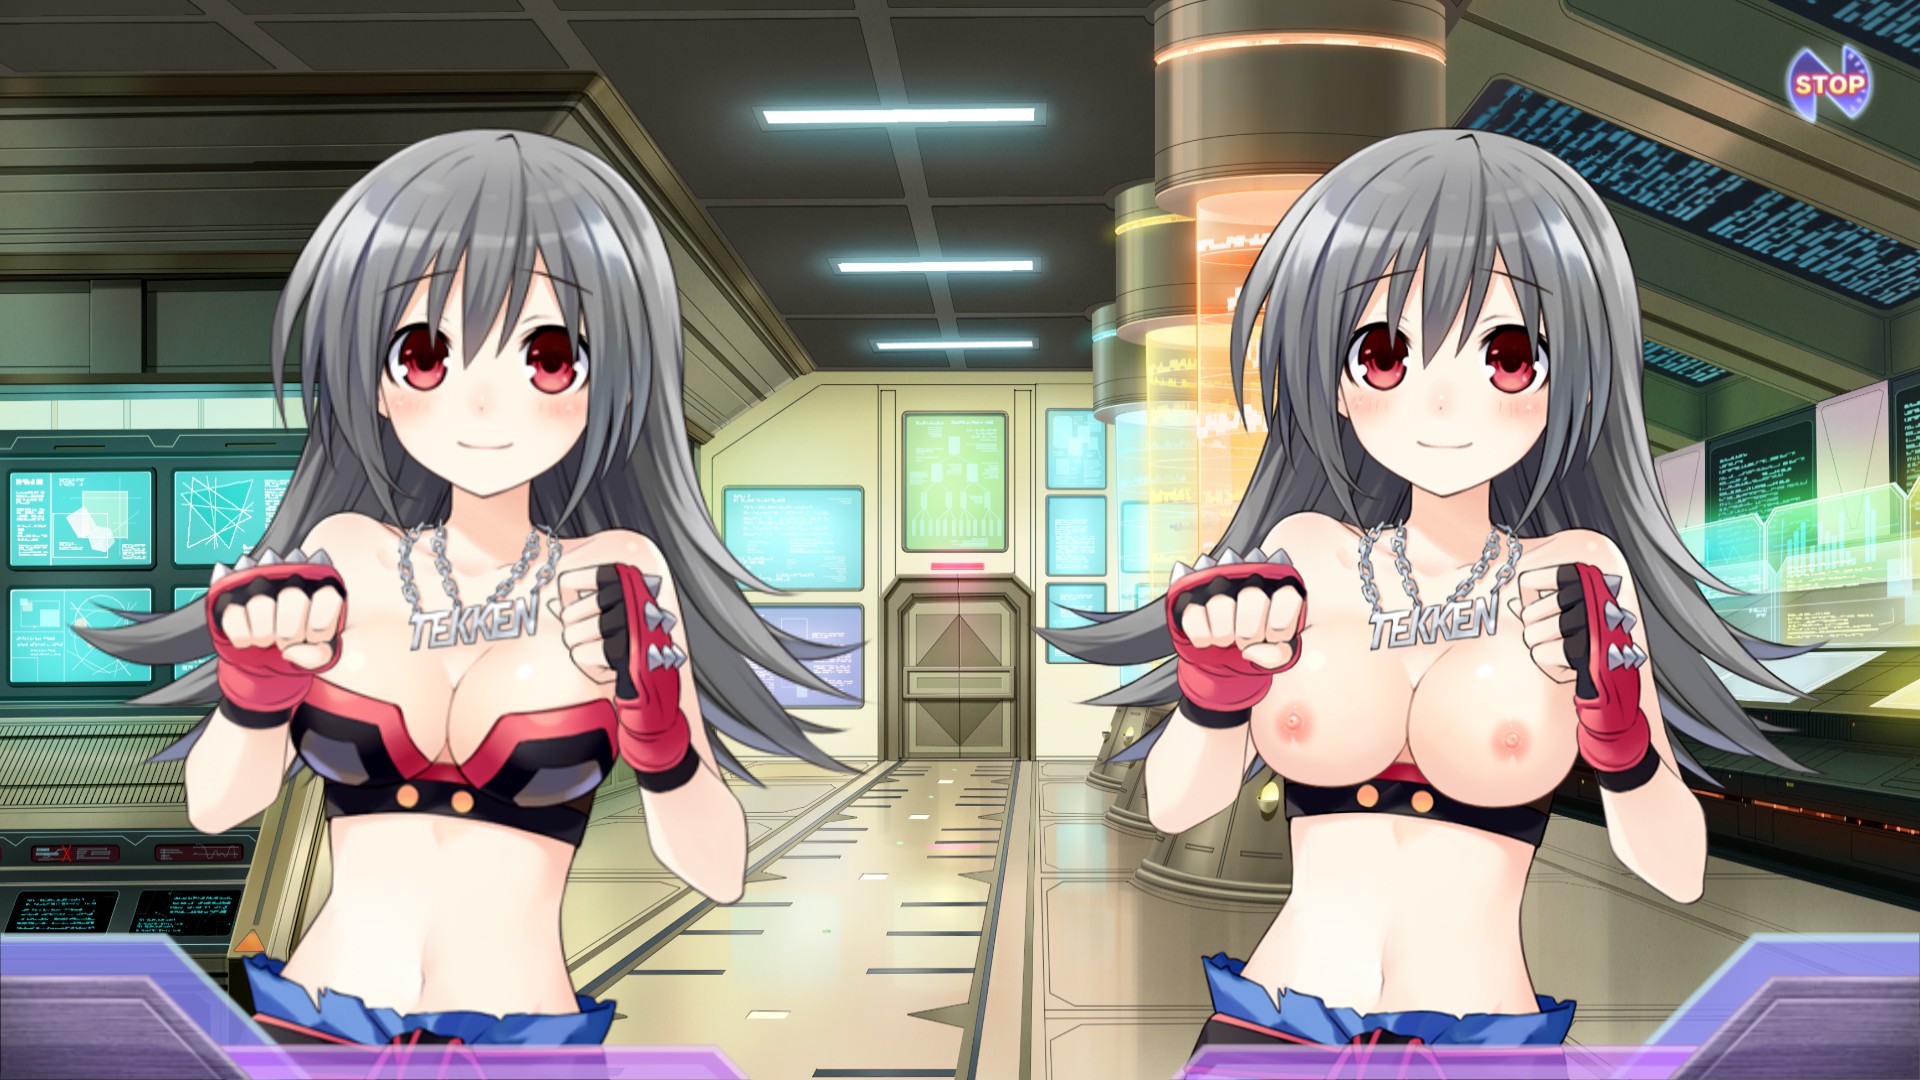
0601 - Tekken (Vertical Fist)
0602 - Tekken (Horizontal Fist)